Install PostgreSQL server on Mac in less than 5 minutes
This tutorial is for those PostgreSQL users:
- Who are new to PostgreSQL
- Who feel clumsy to install and config PostgreSQL using command line
- Who love making things simple and easy
No writing code, no complex configuration, just some simple clicks. Here is all you need:
- DBngin - an all in one app for database version management on Mac.
- TablePlus - a modern, native GUI client for multilple relational databases. This app is optional.
Within a couple of clicks, DBngin helps you create a local database server for PostgreSQL, MySQL, Redis, and more. You can then use DBngin to manage multiple local database servers with multiple versions and ports.
It’s very lightweight and currently available for macOS only.
Step by step how to set up a local PostgreSQL on Mac using DBngin:
- Download and install DBngin from DBngin download page
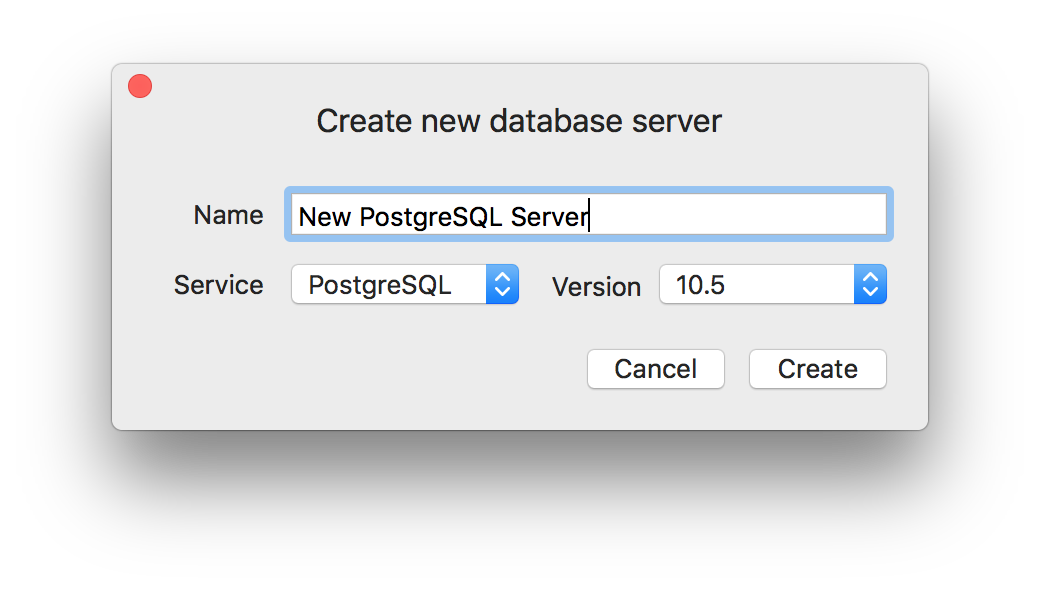
- Open DBngin and click on + new server button
- Choose PostgreSQL from the driver list, choose your PostgreSQL version, and name your server.
- Click Create
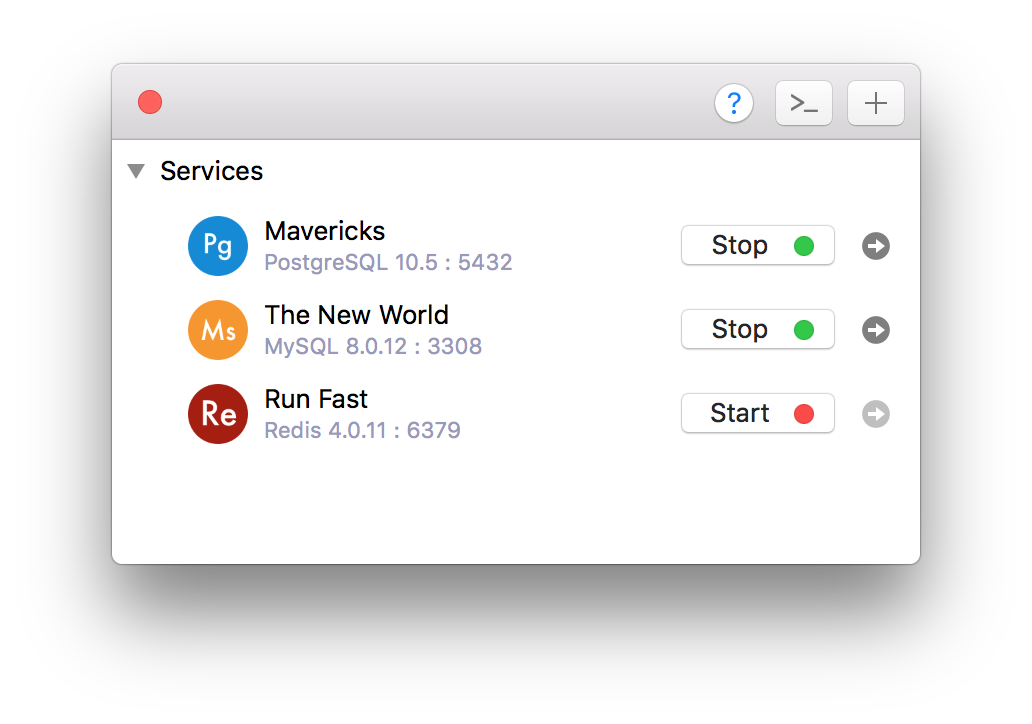
You need to wait a little bit for DBngin to load the binaries for PostgreSQL to start the server, then it’s done.
You now have to local PostgreSQL server running on your Mac.
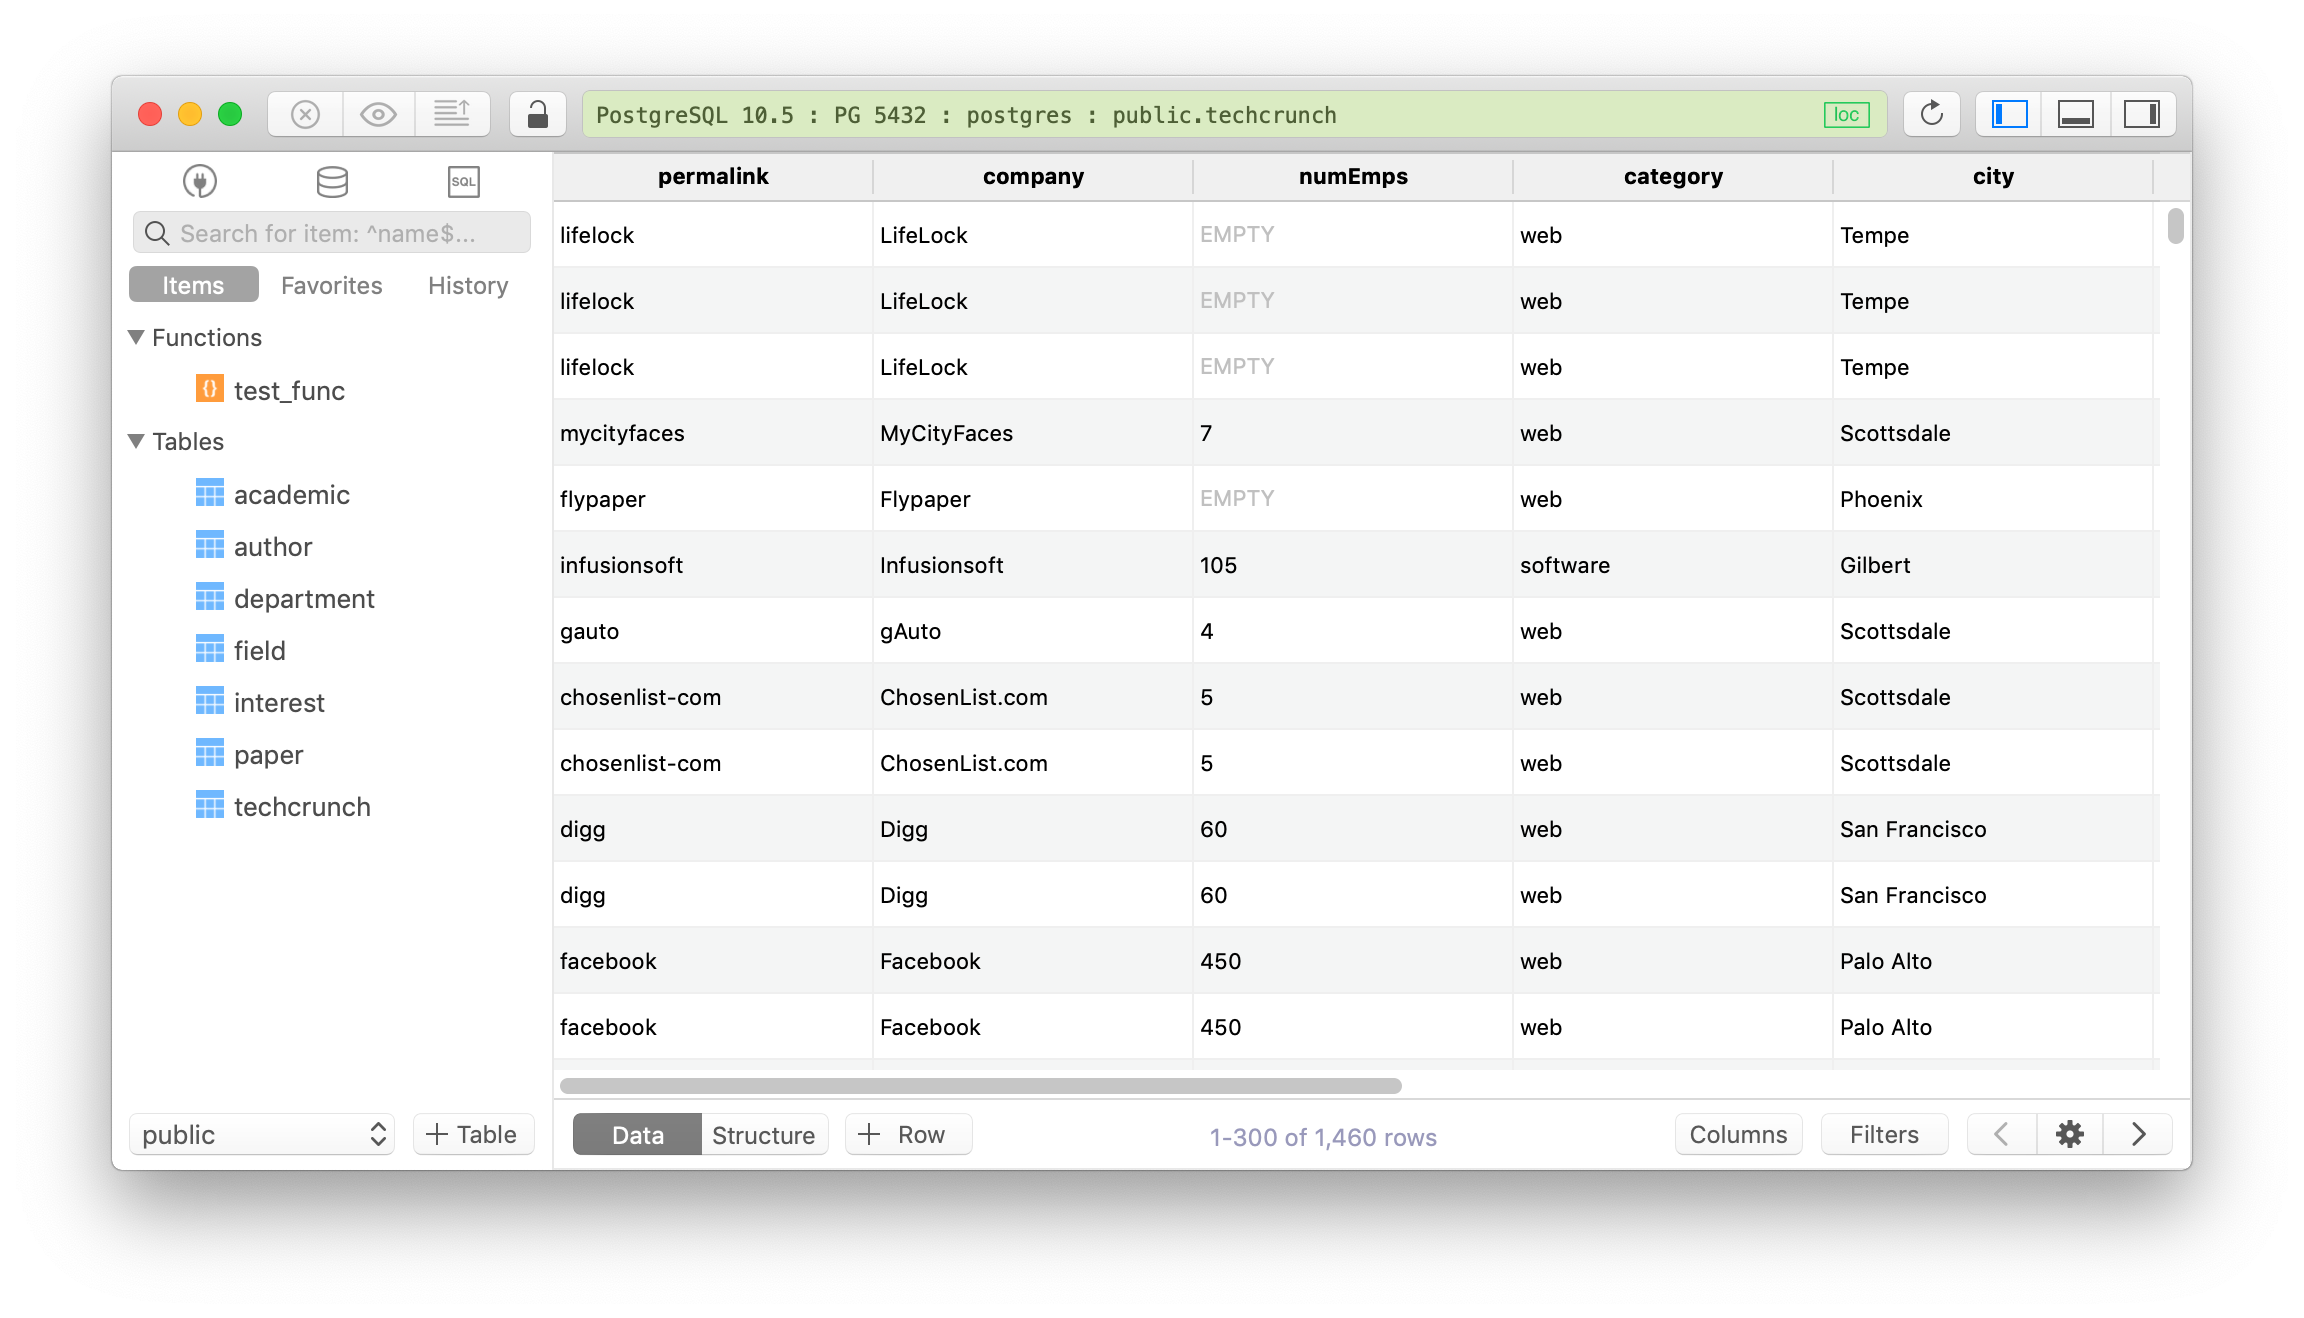
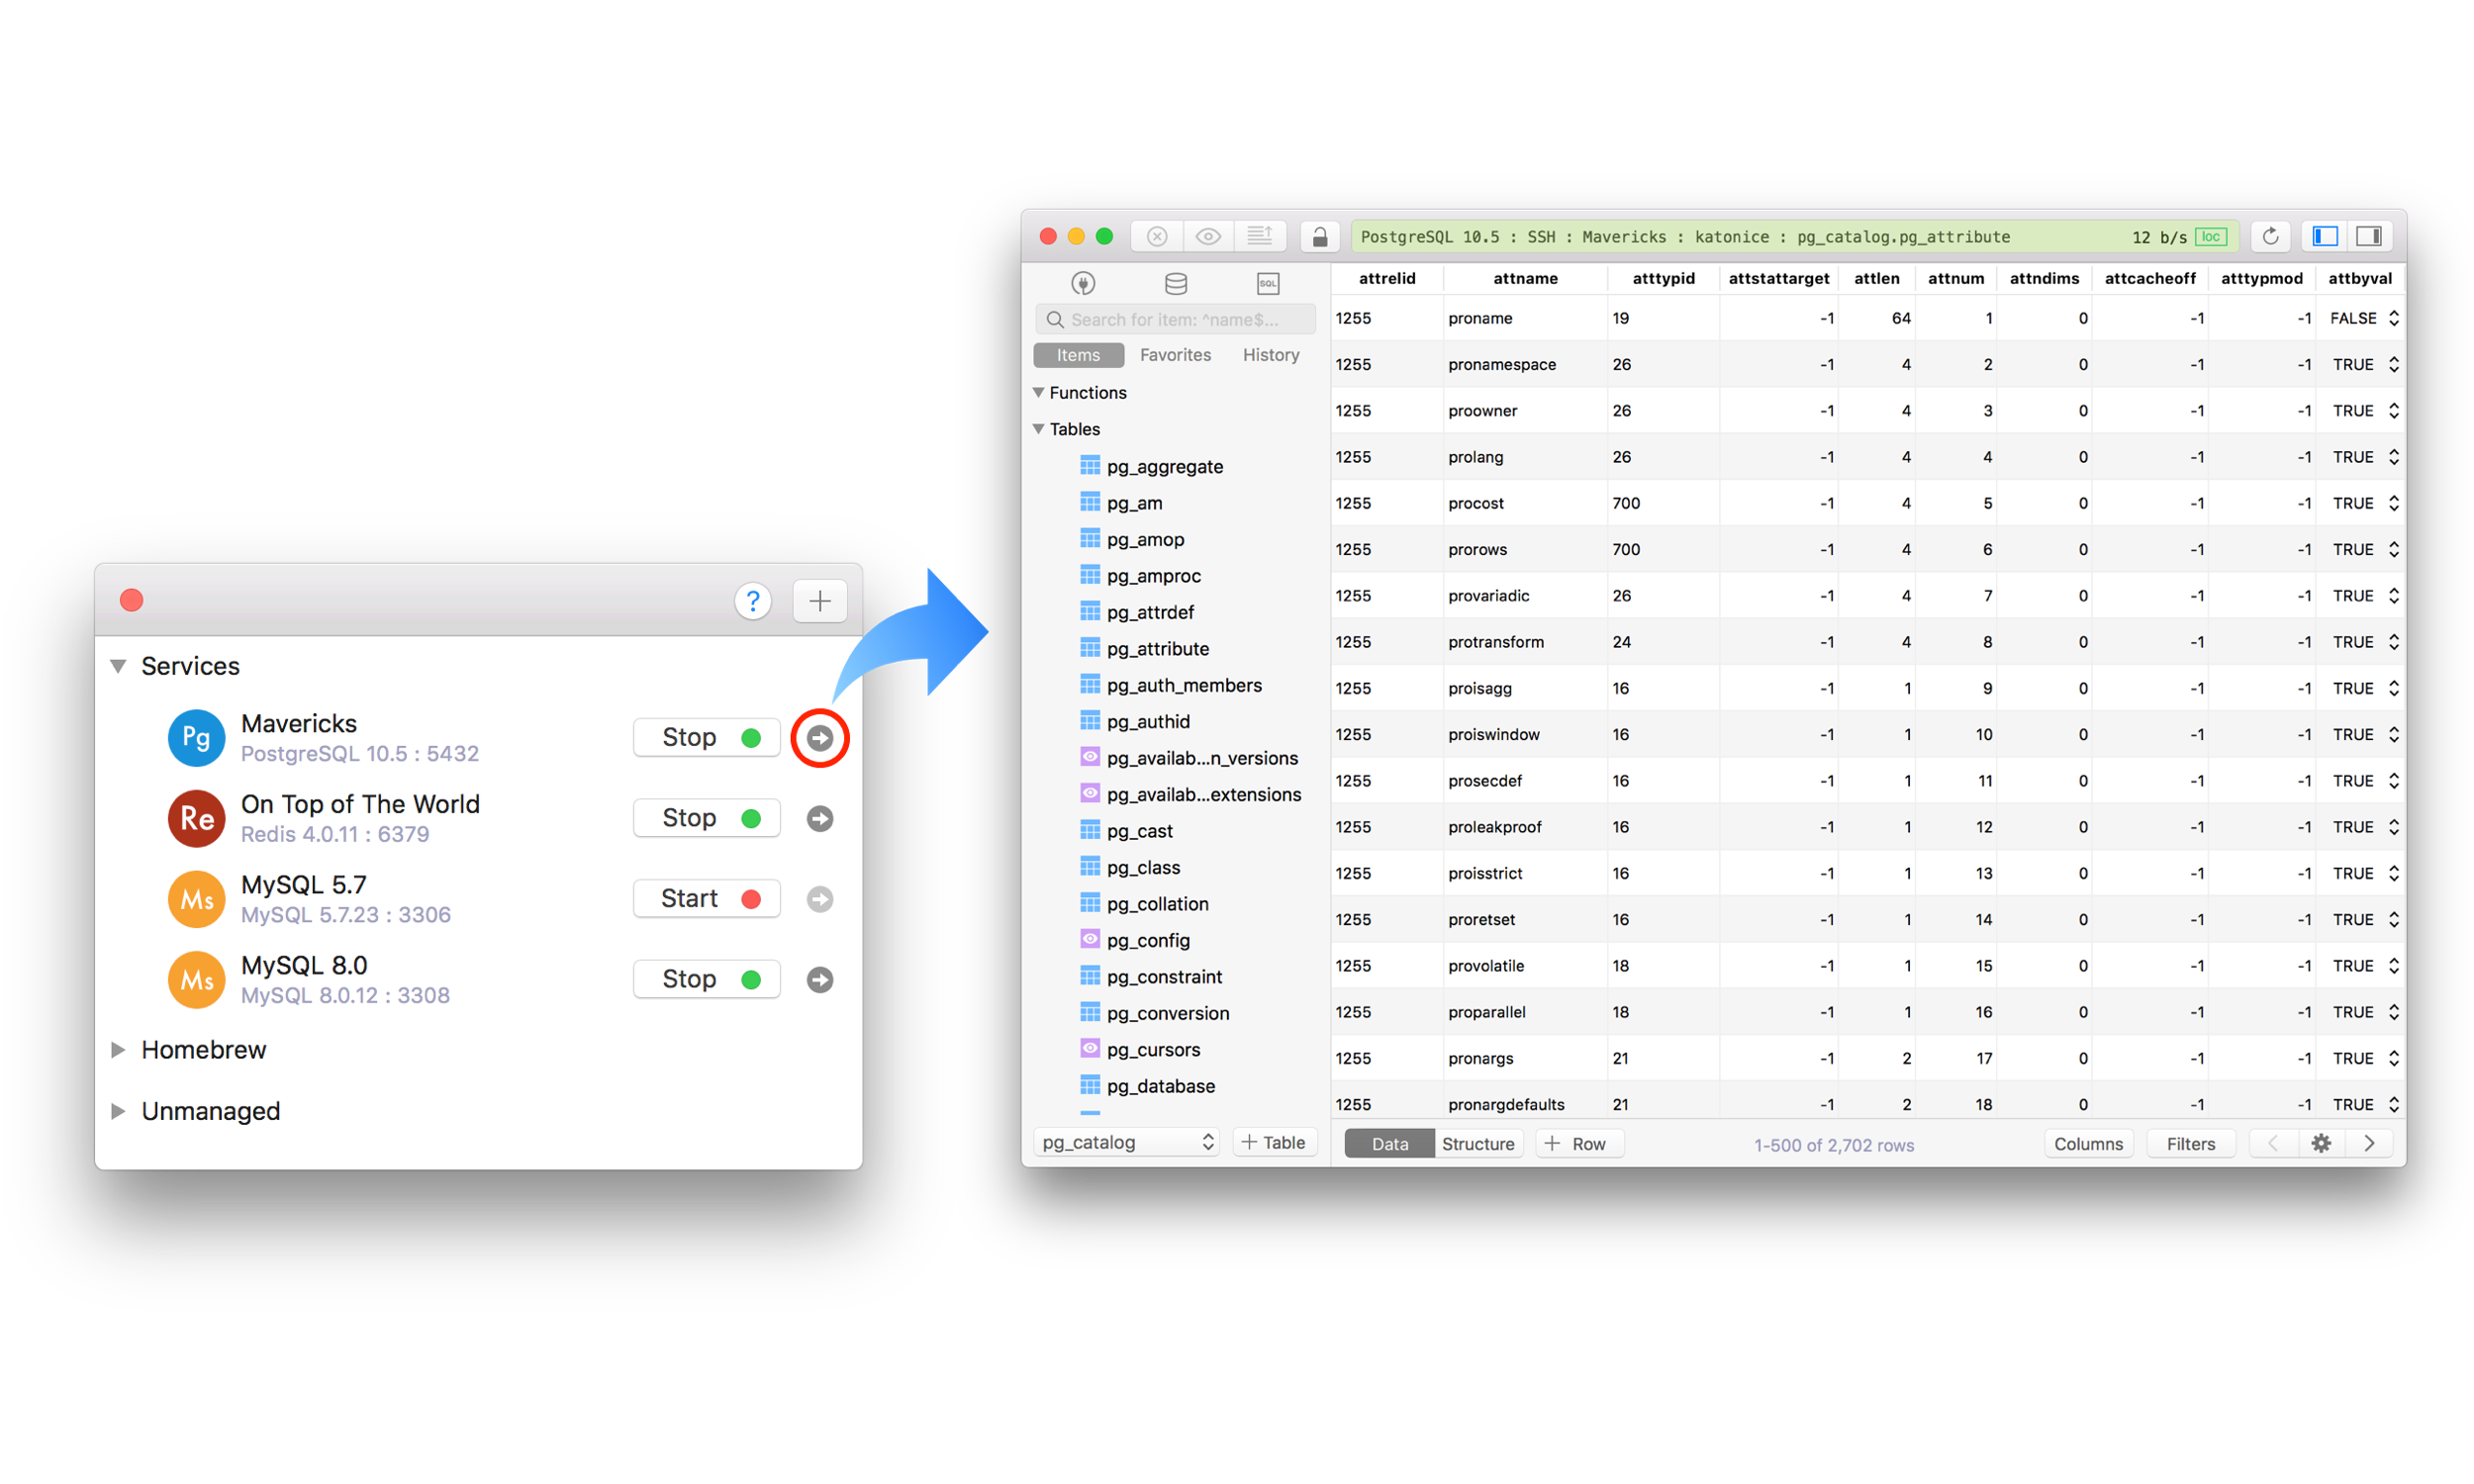
To open your database for browsing, querying, modifying data, click on the arrow button corresponding to the server. DBngin will then open your DB using TablePlus if you already have it installed.
If you haven’t installed TablePlus, it’s recommended to do so.
TablePlus is a modern, native GUI client that allows you to simultaneously manage multiple databases: PostgreSQL, MySQL, MS SQL Server, SQLite, Redis, Oracle, and more. It’s native, beautiful, and available for free.
You can download TablePlus directly from here.