How to connect Supabase to TablePlus
![]()
Steps to connect Supabase to TablePlus
1. Get your Supabase credentials
In your Supabase project dashboard, click Connect.

In the panel, click on Direct.

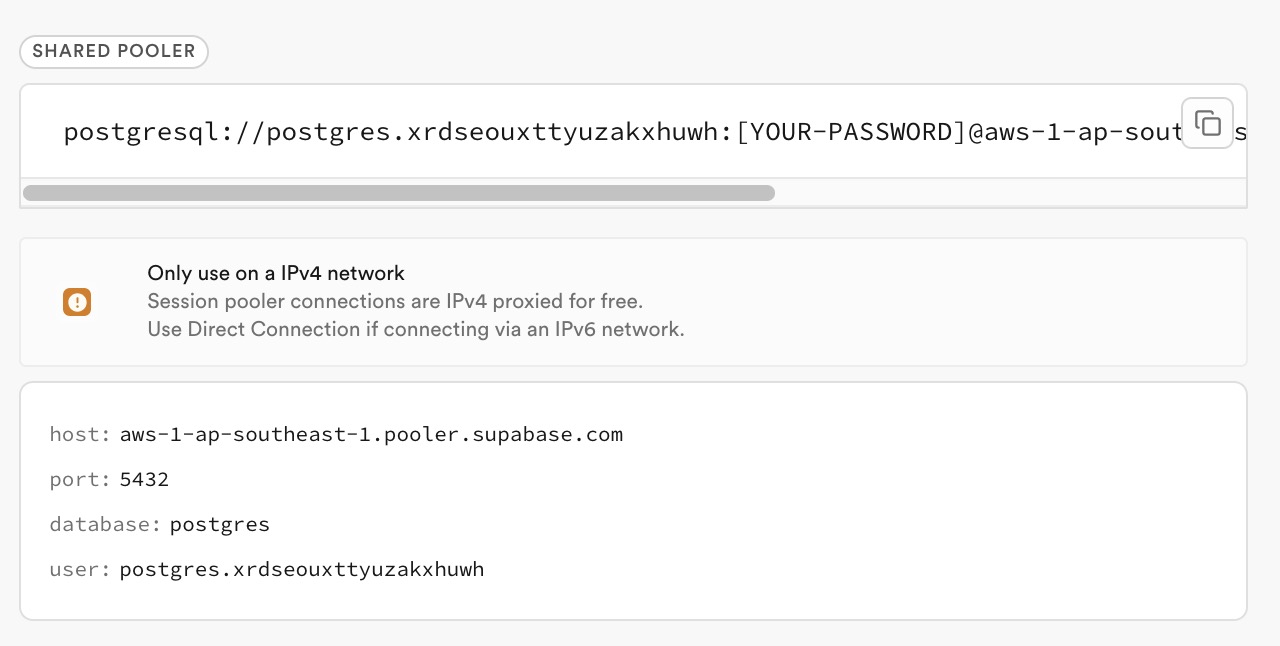
For your connection method, choose Session pooler and note your session pooler’s:
- Host
- Port
- Database
- Username
- Database password (can be reset in project settings if forgotten)
If you’re in an IPv6 environment or have the IPv4 Add-On, you can use the direct connection string instead of Supavisor in Session mode. For this, select Direct connection for your connection method.
For the purpose of most users using the Free Supabase plan, we’ll use the Session pooler option.
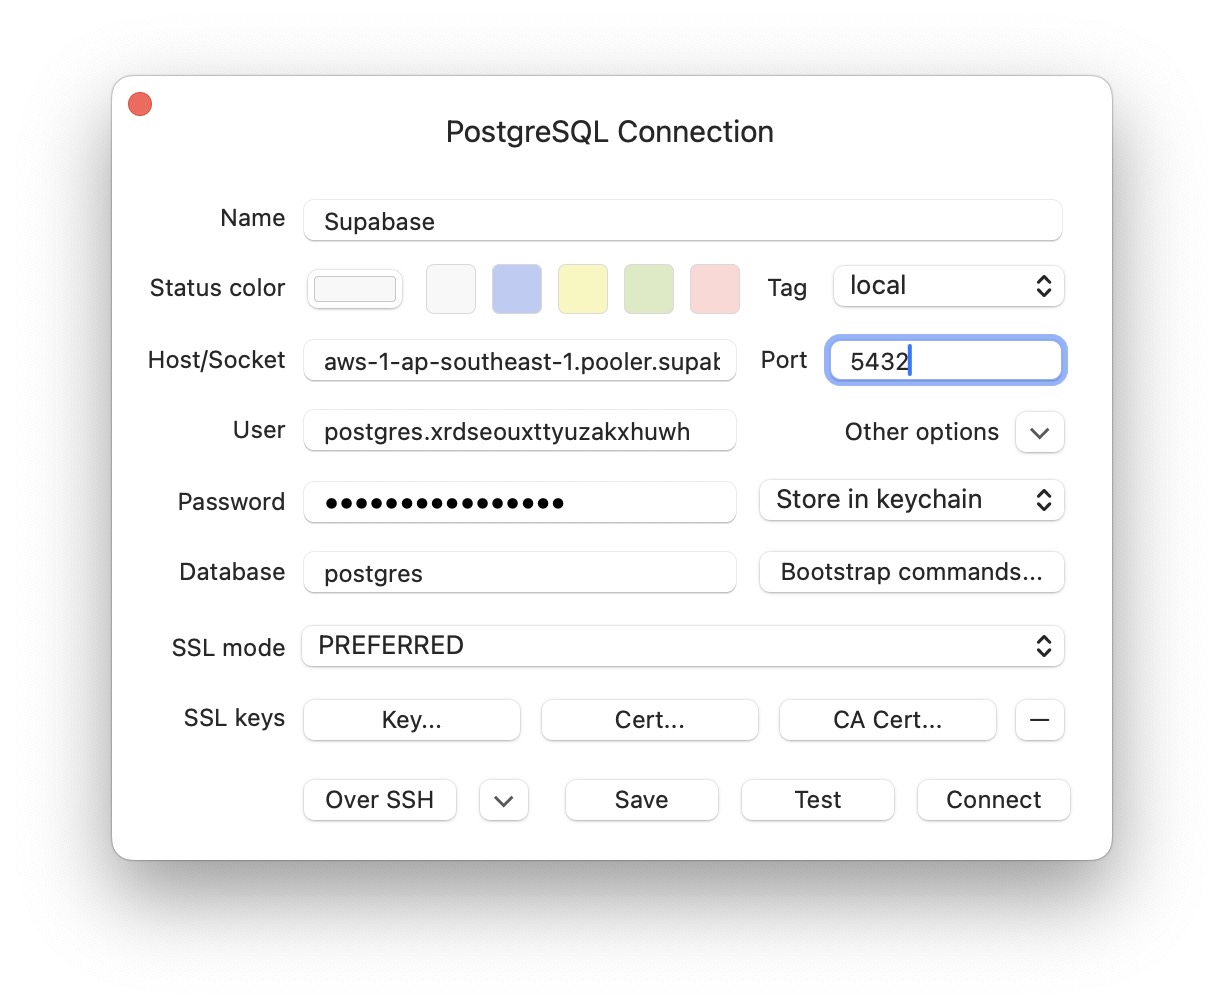
2. Configure TablePlus
Open TablePlus and create a new PostgreSQL connection with the following settings:
| Field | Value |
|---|---|
| Host/Socket | your-project-ref.supabase.co |
| Port | 5432 |
| Database | postgres |
| Username | postgres.your-project-ref |
| Password | Your database password |
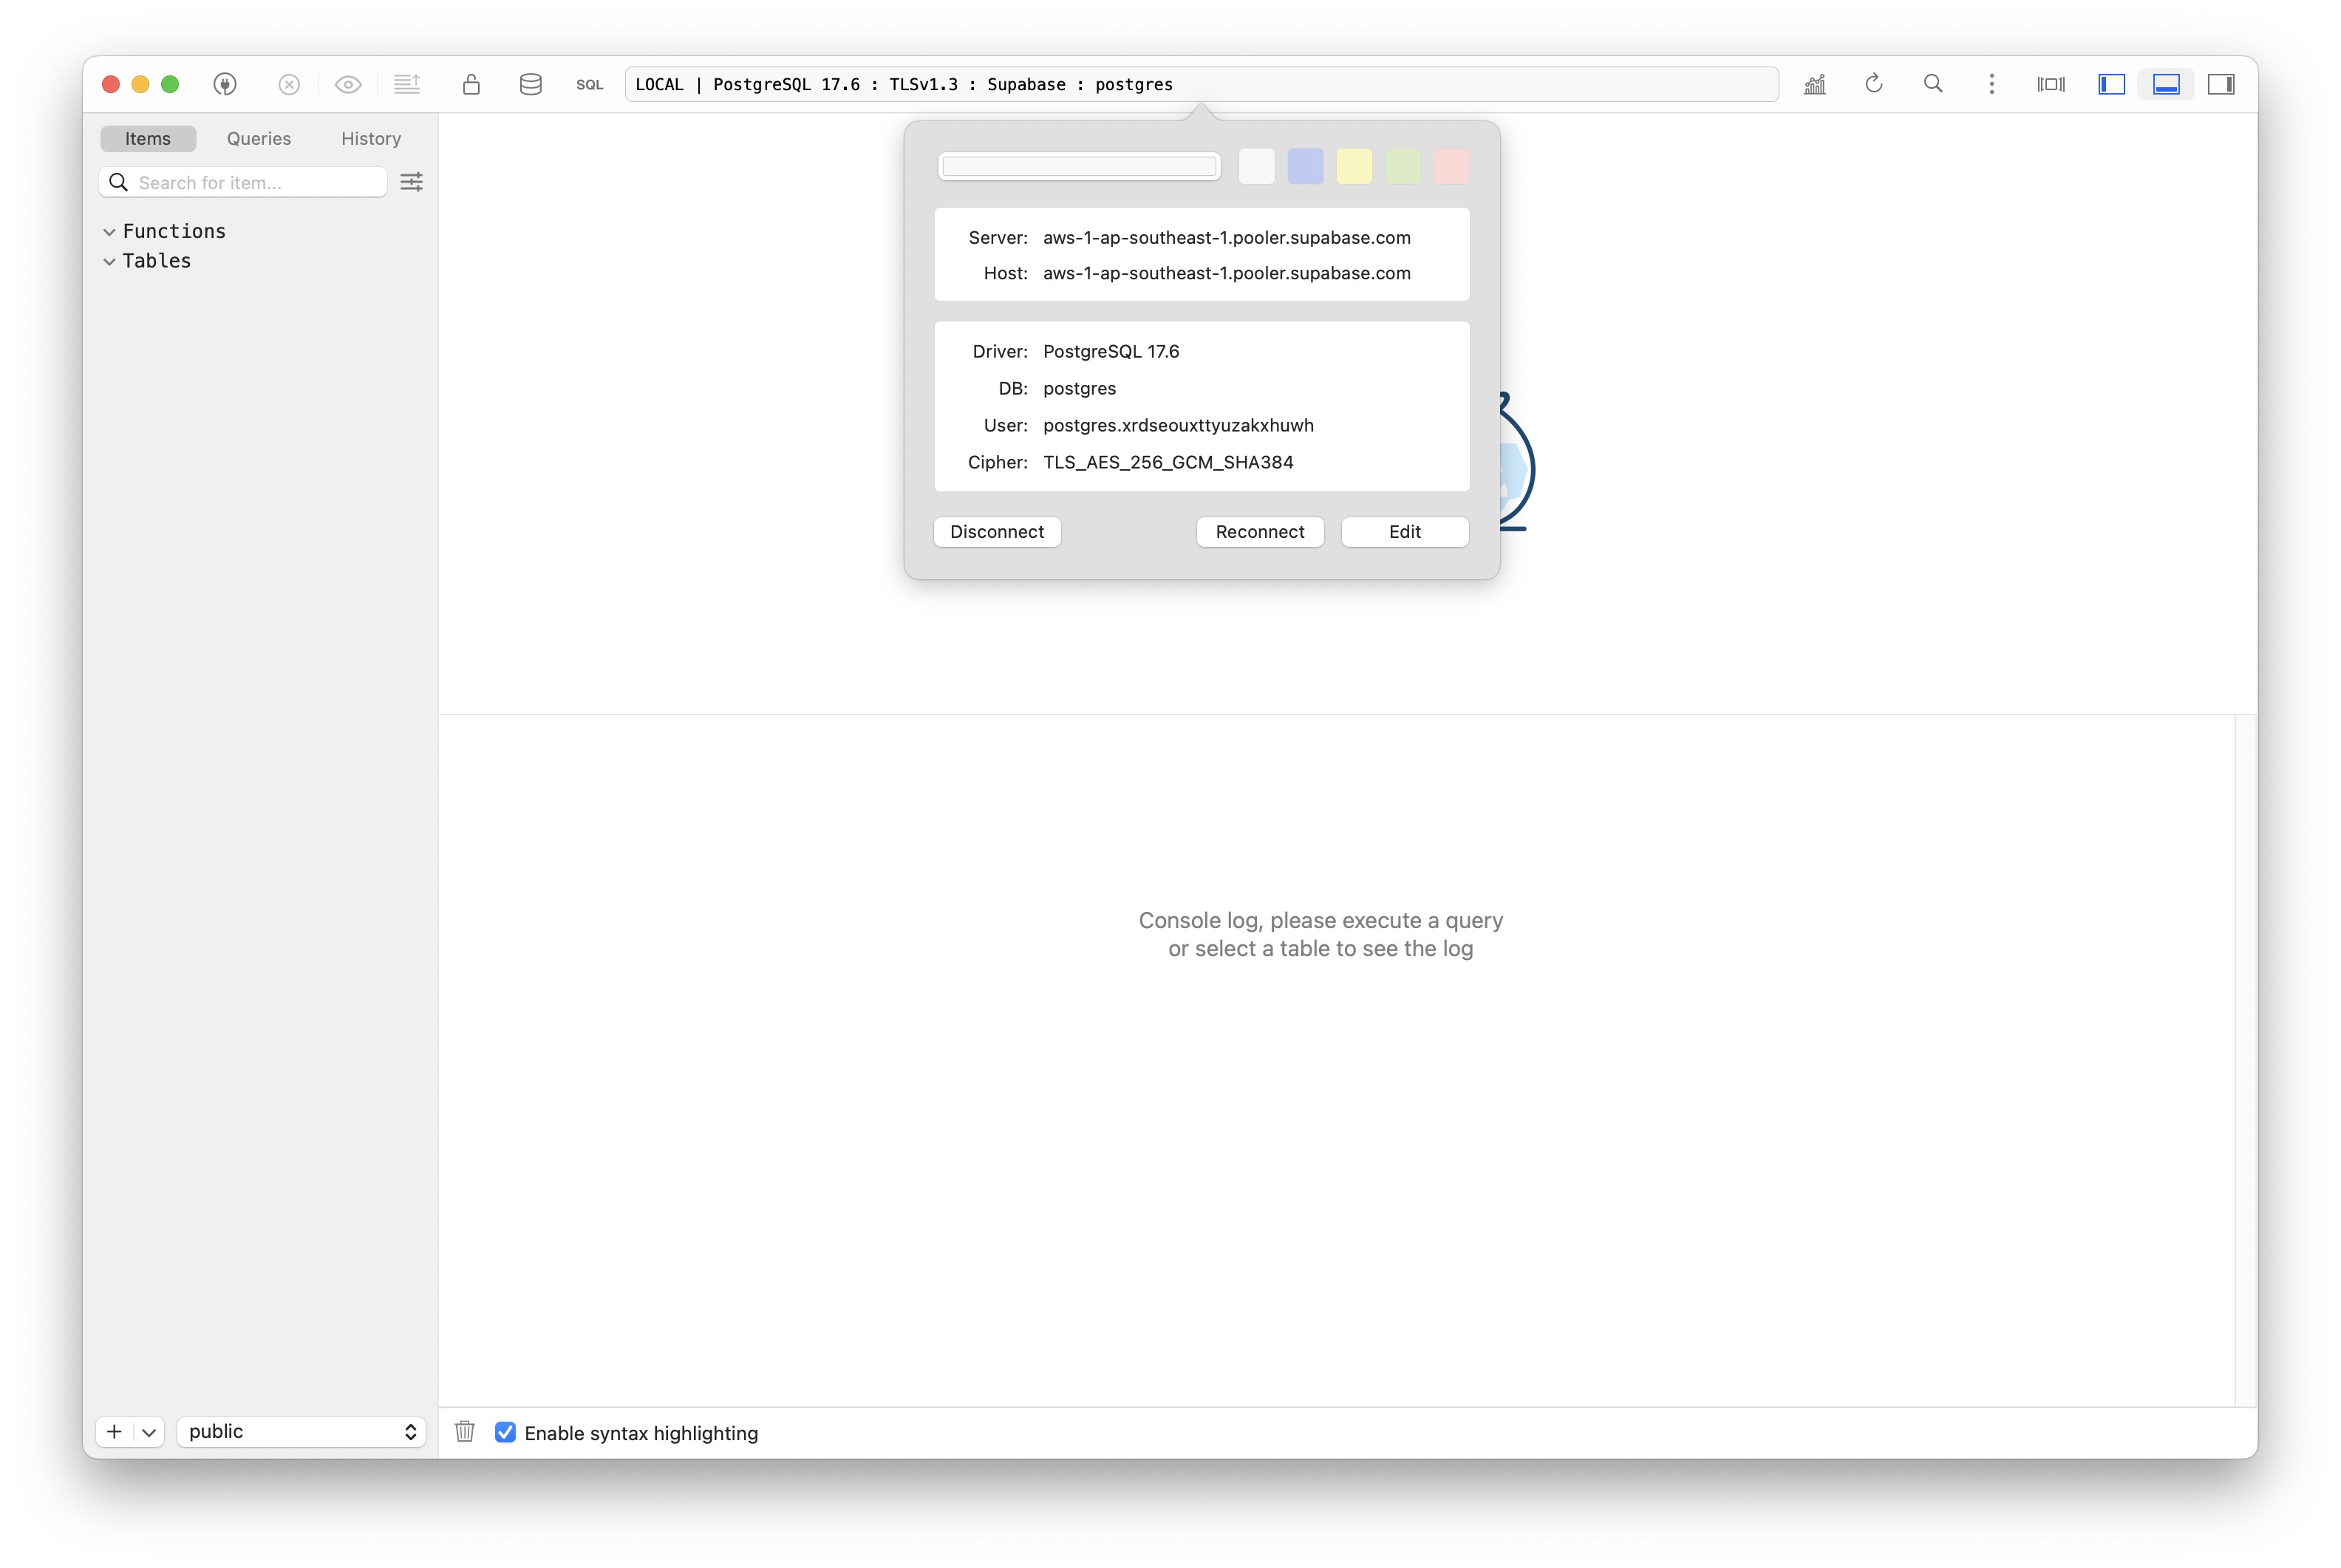
3. Test and connect
Verify the connection is successful, then save. You should now be able to interact with your Supabase database through TablePlus.