Import & Export
TablePlus can import data from CSV, JSON and SQL dump files, and export tables, views and query results to CSV, JSON, SQL and Excel files.
Import data
You can open the import wizards in two ways:
- From the menu File > Import, choose From CSV..., From JSON... or From SQL Dump...
- Right-click a table in the left sidebar and choose Import > From CSV..., From JSON... or From SQL Dump... When you start from a table, the wizard selects that table as the destination.
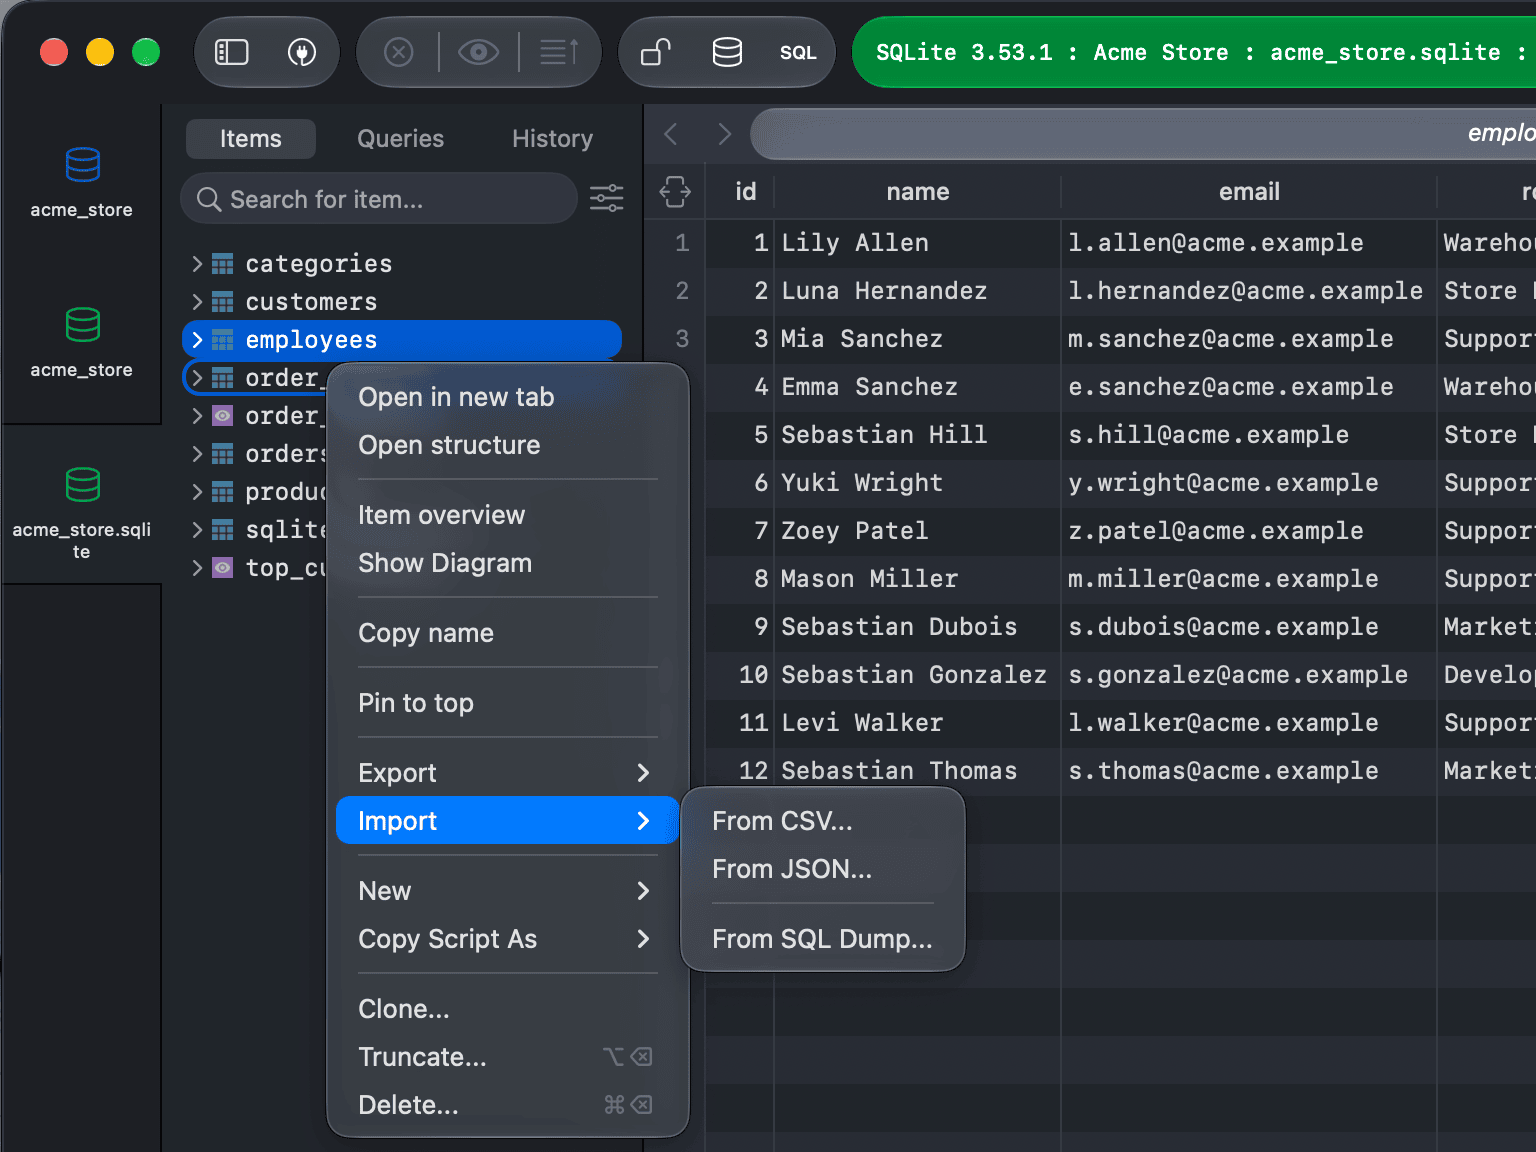
Select a database before you import a CSV or JSON file.
Import from CSV
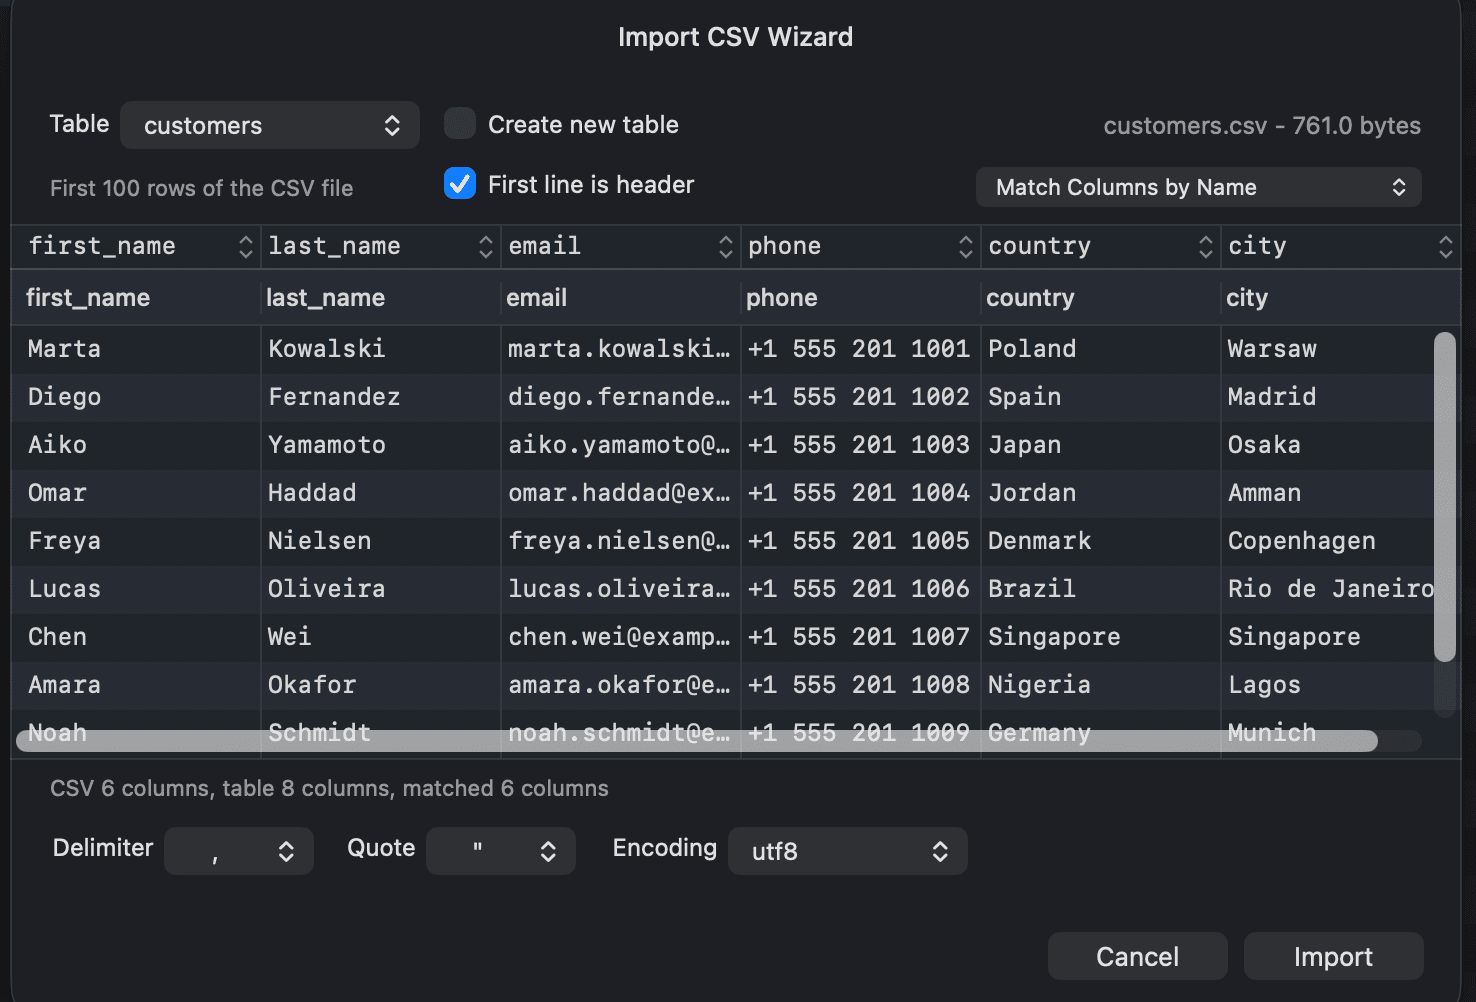
After you pick a file, the Import CSV Wizard shows the first 100 rows of the file at the bottom and the column mapping above it. Set these options:
- Delimiter:
,,;, Tab or a custom delimiter. - Quote:
",'or a custom quote character. - Encoding: the file encoding, such as
utf8(default),macOSRomanorwindowsCP1252. - First line is header: use the first row as column names instead of data.
- Table: the destination table.
- Create new table: create a new table named after the file instead of importing into an existing one. You can let TablePlus detect the column data types, or create all columns as text.
- Matching strategy: how CSV columns are matched to table columns: by name and order, by name, or by order, with case-insensitive options for name matching.
- Insert option (PostgreSQL, MySQL and MariaDB only): what to do when a row conflicts with an existing key: STOP ON ERROR, UPDATE ON DUPLICATE, or REPLACE (MySQL and MariaDB).
To change the mapping of a single column, click the cell above that column and choose a destination column, a data type (when you create a new table), or Do not import.
Click Import to start.
Import from JSON
The Import JSON Wizard works like the CSV wizard: it previews the first 100 records of the file and lets you choose the encoding, the destination table (or Create new table), the matching strategy and the insert option.
Import from SQL dump
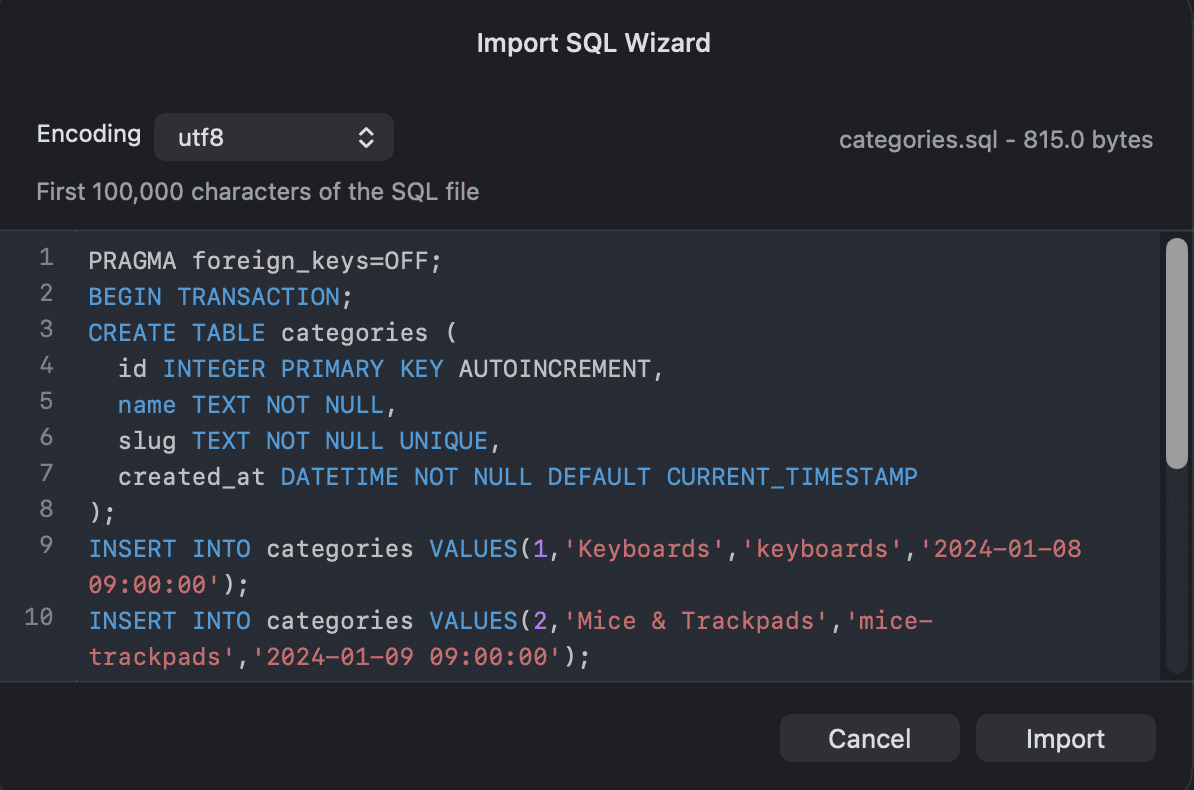
The Import SQL Wizard previews the first 100,000 characters of the file. Choose the file Encoding and click Import to run the statements against the current database.
To restore a full backup made with
pg_dumpormysqldump, use Backup & Restore instead.
Export data
To export tables and views from the current database:
- Select one or more items in the left sidebar.
- Navigate to File > Export > Export Tables... (
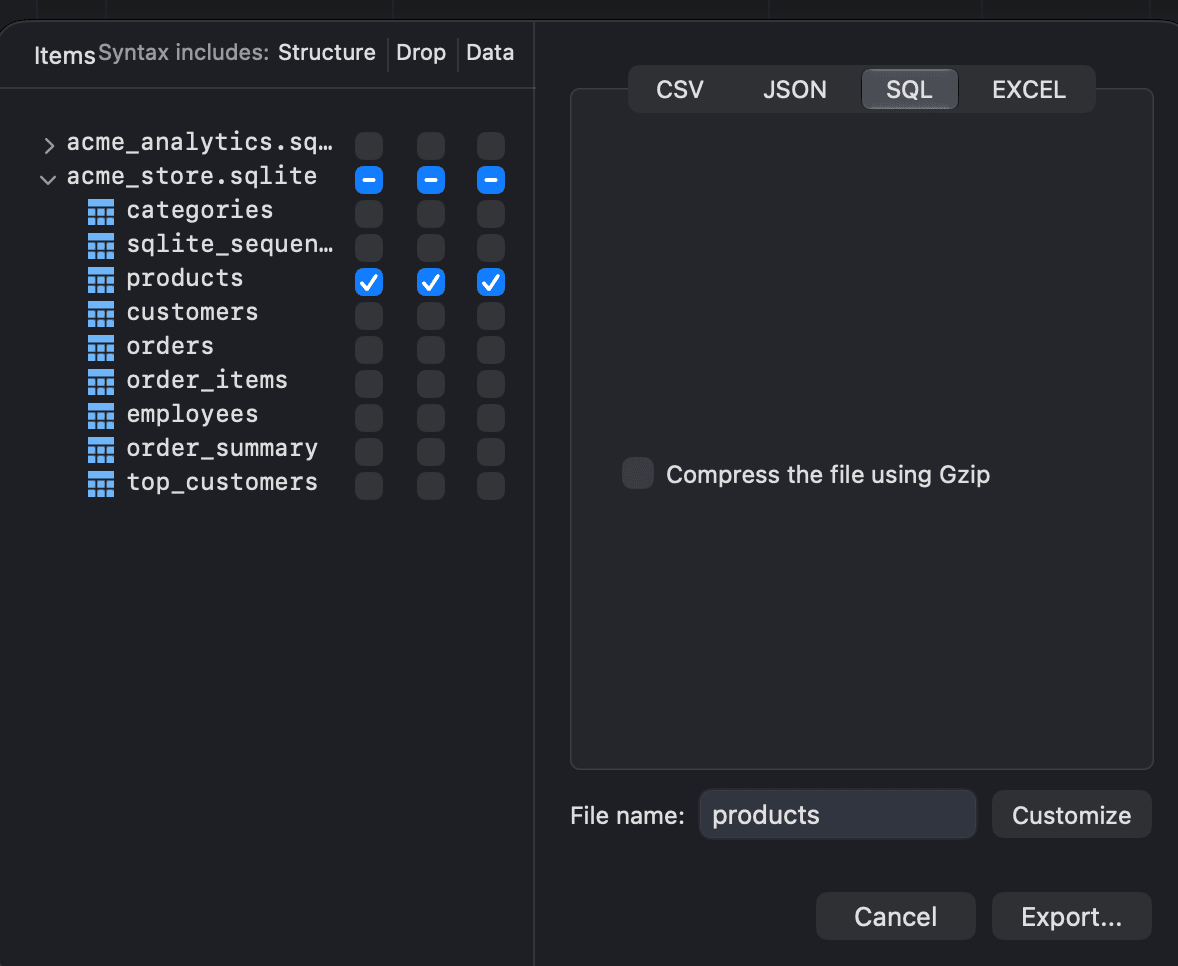
⌘ + Shift + E), or right-click the selection and choose Export > Export Tables... - In the export window, check the items you want to export. You can switch schemas and check items in more than one.
- Choose the format tab: CSV, JSON, SQL or EXCEL, and set its options.
- Click Export..., choose where to save the file and confirm.
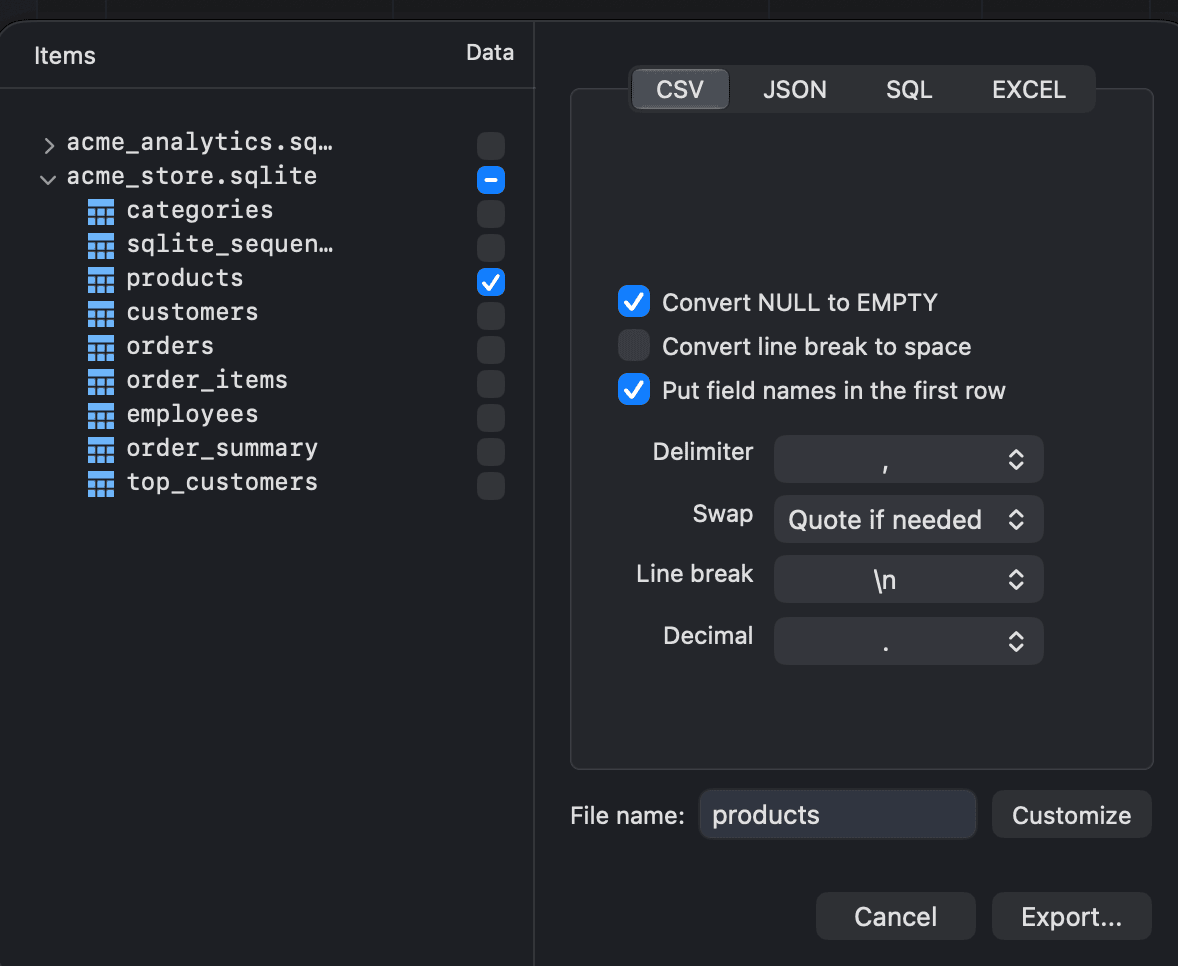
For CSV, JSON and Excel, TablePlus creates a folder with one file per table or view. For SQL, it writes all the items to a single .sql file.
The File name field shows the default name of the export. Click Customize to build the name from patterns such as the connection name, database name, table name, tag and date/time parts.
Format options
| Format | Options |
|---|---|
| CSV | Delimiter, Swap (quote character), Line break, Decimal separator, Convert NULL to EMPTY, Convert line break to space, Put field names in the first row |
| JSON | Exports rows as an array of JSON objects |
| SQL | For each item, choose whether to include its Structure, a Drop statement and its Data. Compress the file using Gzip saves a .gz file. |
| EXCEL | Exports each table to an .xlsx workbook |
Export a table with column selection
To export only some columns of one table, right-click the table and choose Export > Export this Table with Column Selection... In this window you can select the fields to export and, for SQL, choose whether to include the table structure, the table content and a DROP TABLE IF EXISTS statement.
To export the result of a query instead, see Working With Query Results.
Run imports and exports in the background
While an import or export is running, its progress window has an Import in Background or Export in Background button. Click it to close the progress window and keep working in the workspace. The job moves to the Notifications button on the toolbar, where you can follow its progress, stop it, or click Open Folder to show the exported file in Finder when it completes.
