Connections & Command Line (CLI)
TablePlus connects directly from your computer to your database server. Nothing goes through our servers: TablePlus never sends or stores your data anywhere else, and database and SSH passwords are saved in your Mac's Keychain. See our Privacy Policy.
To get connected, prepare your database credentials: the database driver, host, port, user name, and password.
The welcome window
When you launch TablePlus, the welcome window lists your saved connections on the right. From the left side you can create a connection, back up a database, or restore one.
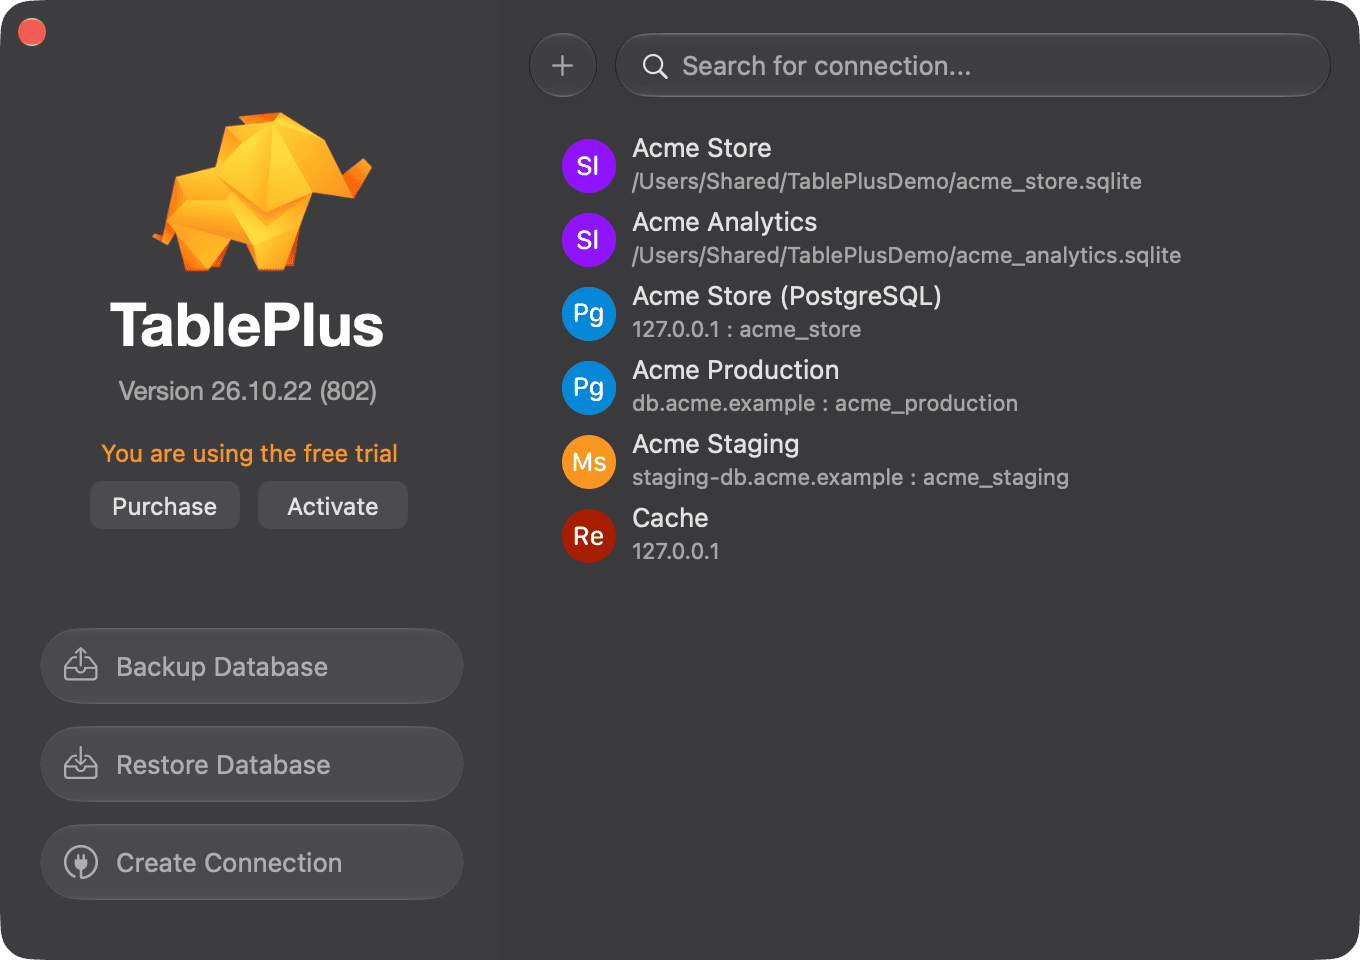
- Double-click a connection to open it.
- Type in the search field at the top (
⌘ + F) to find a connection by name. - Right-click a connection for more actions: Connect, New, Edit..., Duplicate, Copy as URL, Sort By (Tag, Name, Driver), Import Connection, Export Connections, and Delete.
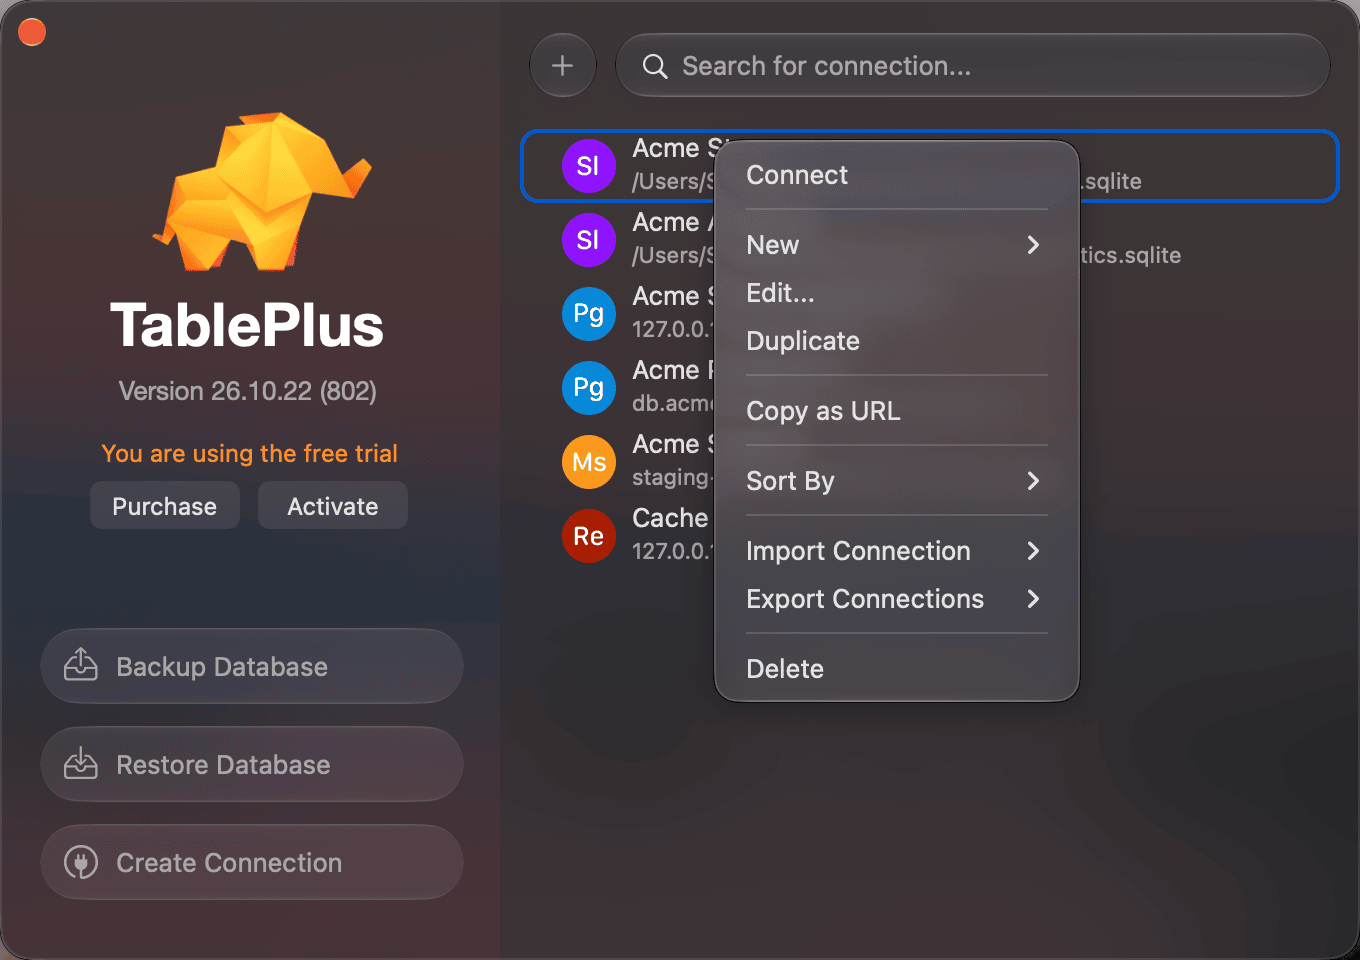
Create a connection
Using the connection form
- On the welcome window, click Create Connection (or the + button next to the search field). You can also use the menu Connection > New....
- Choose the database driver and click Create.
- Fill in the connection details, such as host, port, user, password, and database.
- Click Test to check the connection, then Connect to open it, or Save to add it to the list without connecting.
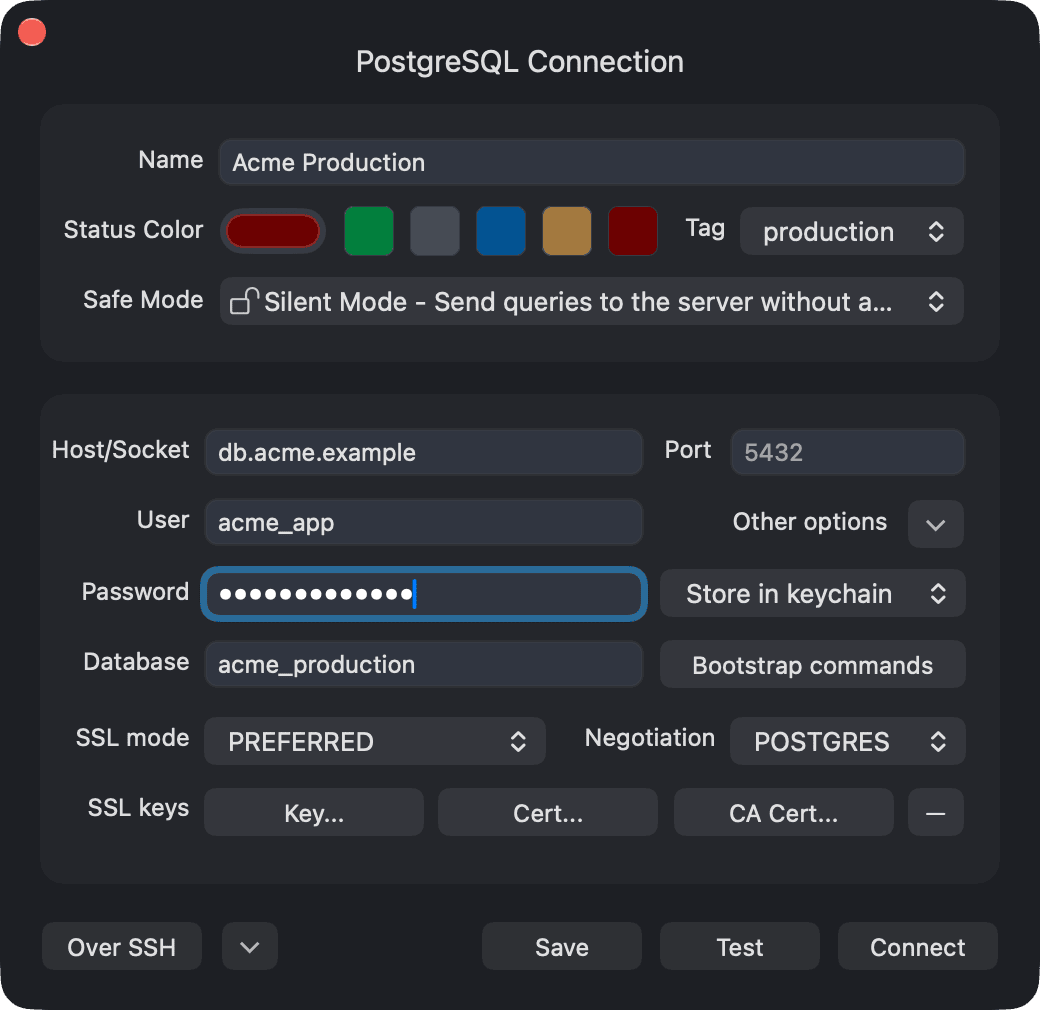
At the top of the form you can set:
- Name: how the connection appears in the list.
- Status Color: the color of the status bar in the workspace window. It helps you tell connections apart, for example production and staging.
- Tag: the environment tag of the connection (see Connection tags).
- Safe Mode: whether TablePlus warns you or asks for your password before sending queries. See Safe mode.
The password field has a menu to choose how the password is stored:
- Store in keychain: save the password in the Keychain (default).
- Ask every time: TablePlus asks for the password each time you connect.
- No password: connect without a password.
- Command Line: enter a shell command instead of a password. TablePlus runs it when connecting and uses its output as the password, which is useful for short-lived tokens. Available for PostgreSQL, MySQL, MariaDB, and Redshift. For SQL Server, set Auth Type to Microsoft Entra ID (Token Only) and choose Get from CLI to get the access token from a command.
Use Bootstrap commands to enter SQL statements that run right after the connection is established.
Importing a connection URL
If you already have a connection URL, you can create a connection from it:
- On the welcome window, right-click and choose New > Import Connection > From URL... (or click Import Connection > From URL... in the driver window).
- Paste the URL and click Import.
- Review the connection form that TablePlus fills in, then connect or save it.
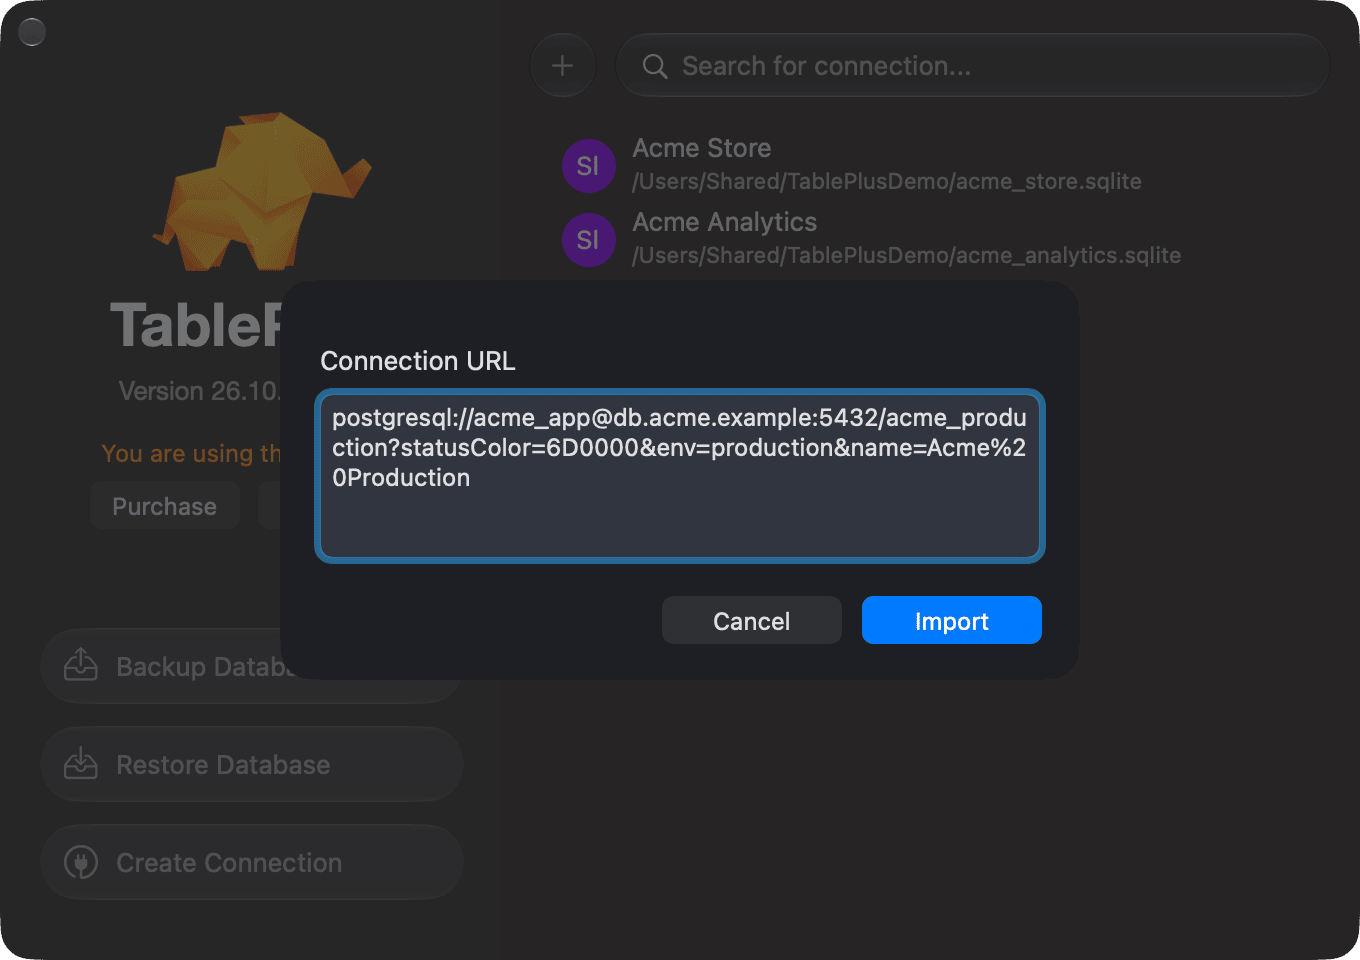
For example, a PostgreSQL URL looks like this: postgresql://user:password@host:port/database. See Connection URL format for all supported schemes and options.
SSH tunneling
To connect through an SSH server, click Over SSH in the connection form and enter the SSH server, port, user, and password. TablePlus has a built-in native SSH client.
To use key-based authentication, tick Use SSH key and click Import a private key... to choose your private key file (not the .pub file). If you tick Use SSH key and leave the private key empty, TablePlus uses your ~/.ssh/config.
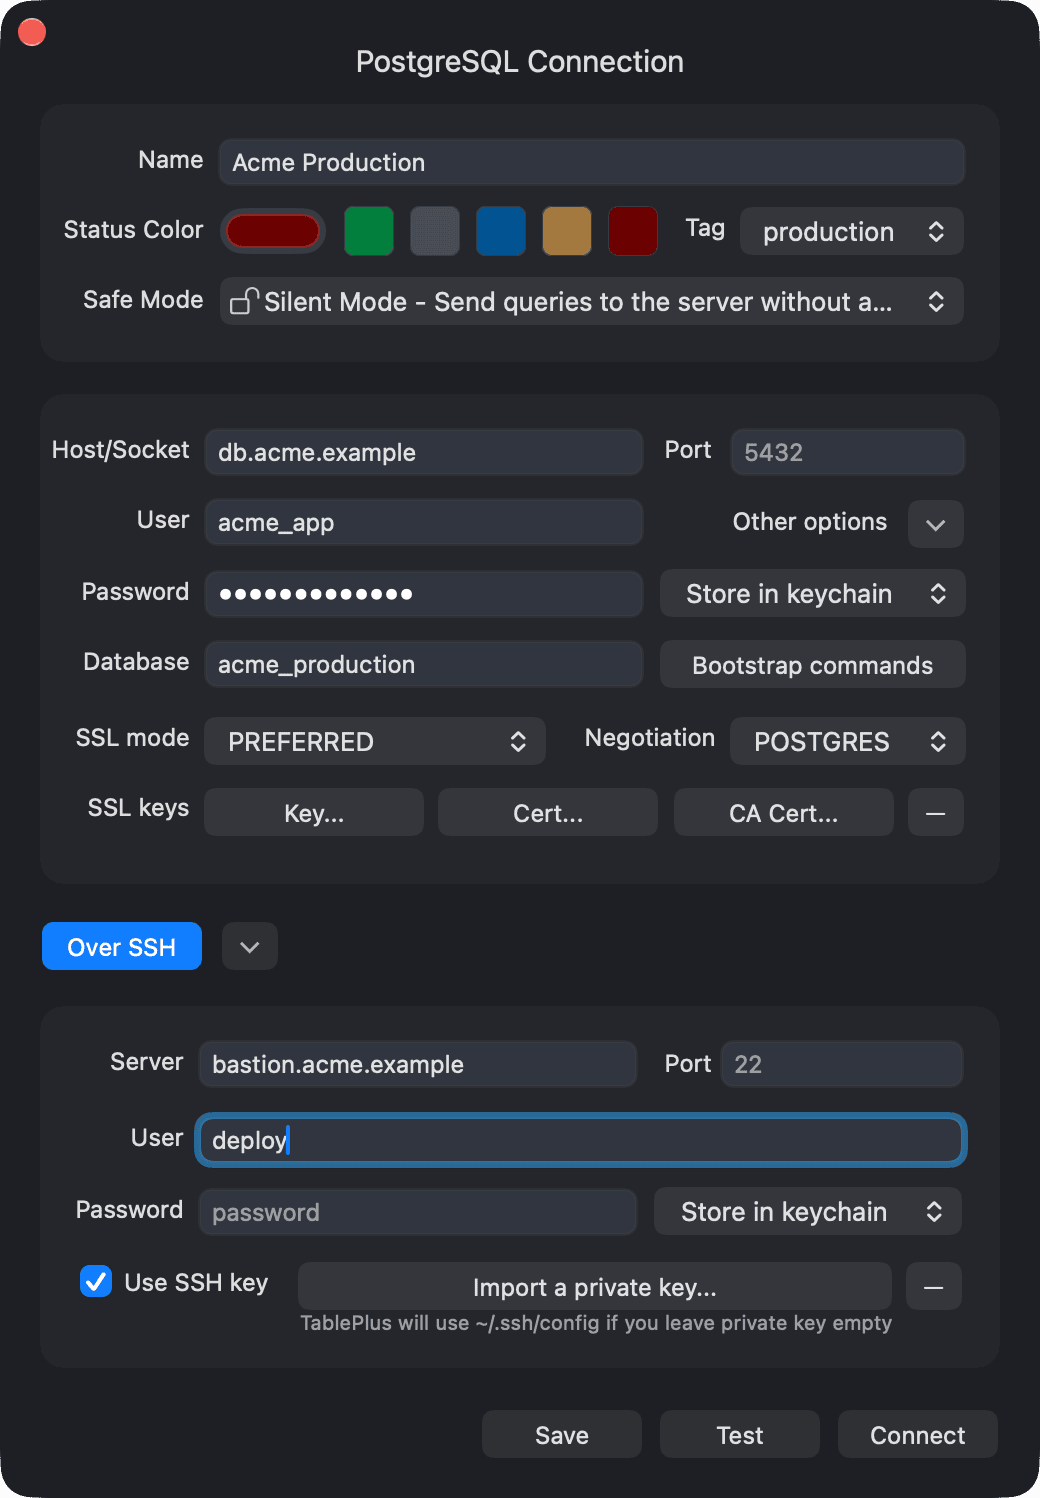
The SSH password menu has the same Store in keychain, Ask every time, and No password options as the database password.
If you have trouble connecting over SSH, enable the log in Help > Enable SSH & Bash Script Log, then send it to [email protected]. It helps us troubleshoot faster.
SSL
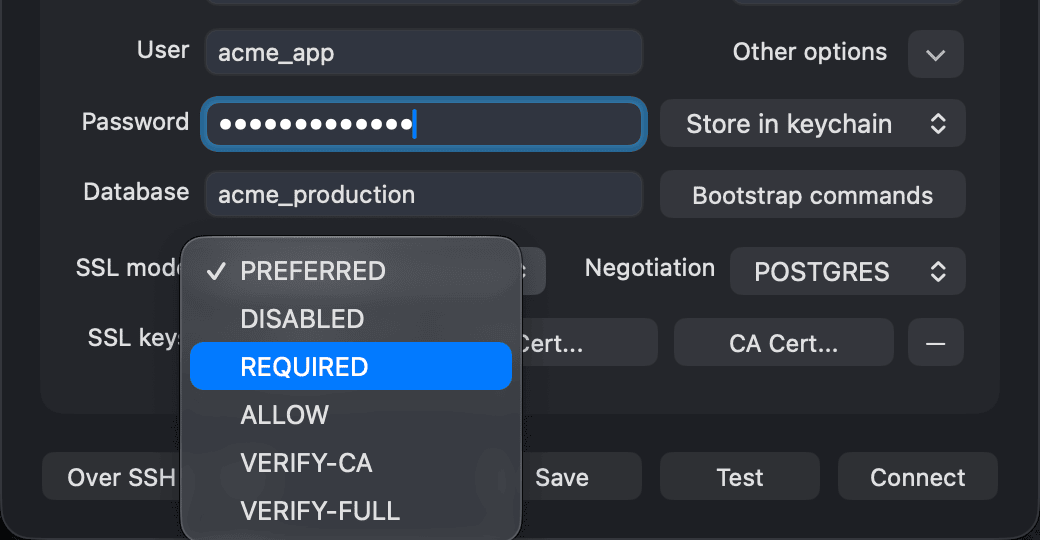
For drivers that support it, set the SSL mode in the connection form. For PostgreSQL the options are PREFERRED, DISABLED, REQUIRED, ALLOW, VERIFY-CA, and VERIFY-FULL; for MySQL they are PREFERRED, DISABLED, REQUIRED, VERIFY-CA, and VERIFY-IDENTITY.
Next to SSL keys, use Key..., Cert..., and CA Cert... to choose your client key, client certificate, and CA certificate files.
Connection tags
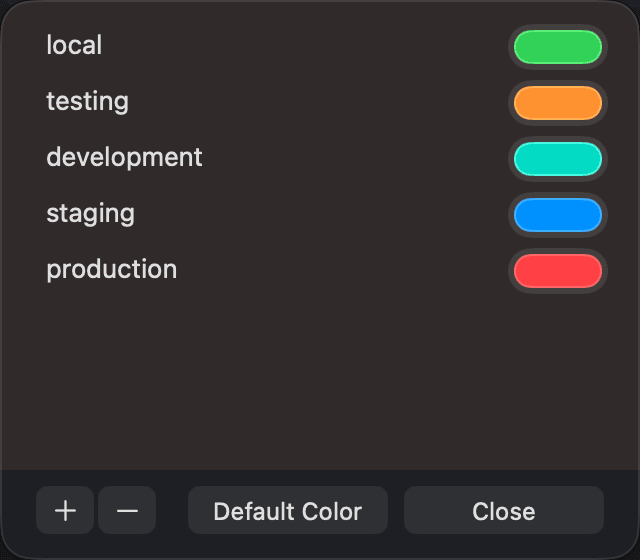
Each connection can have a tag that describes its environment. There are five default tags: local, testing, development, staging, and production. Choose NO TAG to leave a connection untagged.
To create your own tags or change tag colors, open the Tag menu in the connection form and choose Add/remove tags.... Default tags can't be removed, but you can change their colors or click Default Color to restore them.
Saved connections
Edit a saved connection
Right-click the connection on the welcome window and choose Edit....
When you're connected, you can also click the status bar at the top of the workspace window and click Edit. The same popover has Reconnect and Disconnect buttons.
Duplicate a connection
Right-click the connection and choose Duplicate. This is a quick way to create a similar connection, for example for another server.
Restore the last session
TablePlus can reopen the workspaces you were working on when you quit:
- Open Settings (
⌘ + ,) and go to General. - Turn on Reopen closed workspaces at startup.
Keep connection alive
By default, TablePlus pings your servers every 30 seconds to keep the connection open. To turn this off, open Settings (⌘ + ,) > General and turn off Keep connection alive under Connections.
Connection groups
You can organize connections into groups, for example by project or by environment.
Create a group
- On the welcome window, right-click and choose New > Group....
- Enter the group name, optionally click Choose icon, and click Save.
To add a connection to a group, drag it into the group. To remove it, drag it out of the group. Groups can also contain other groups.
Edit or delete a group
- To edit a group, right-click it and choose Edit....
- To delete a group, right-click it and choose Delete. This also deletes the connections inside it.
Export and import connections
You can move connections between computers with a TablePlus connection file (.tableplusconnection).
Export connections
- On the welcome window, right-click and choose Export Connections, then:
- Export all... to export every connection in the section you right-clicked (all your saved connections if you only have the Local source),
- Export this group... to export the connections in the selected group, or
- Export this connection.. to export only the selected connection.
- Choose whether to Include databases password and Include servers password.
- Enter a password to secure the file, click Save..., and choose where to save it.
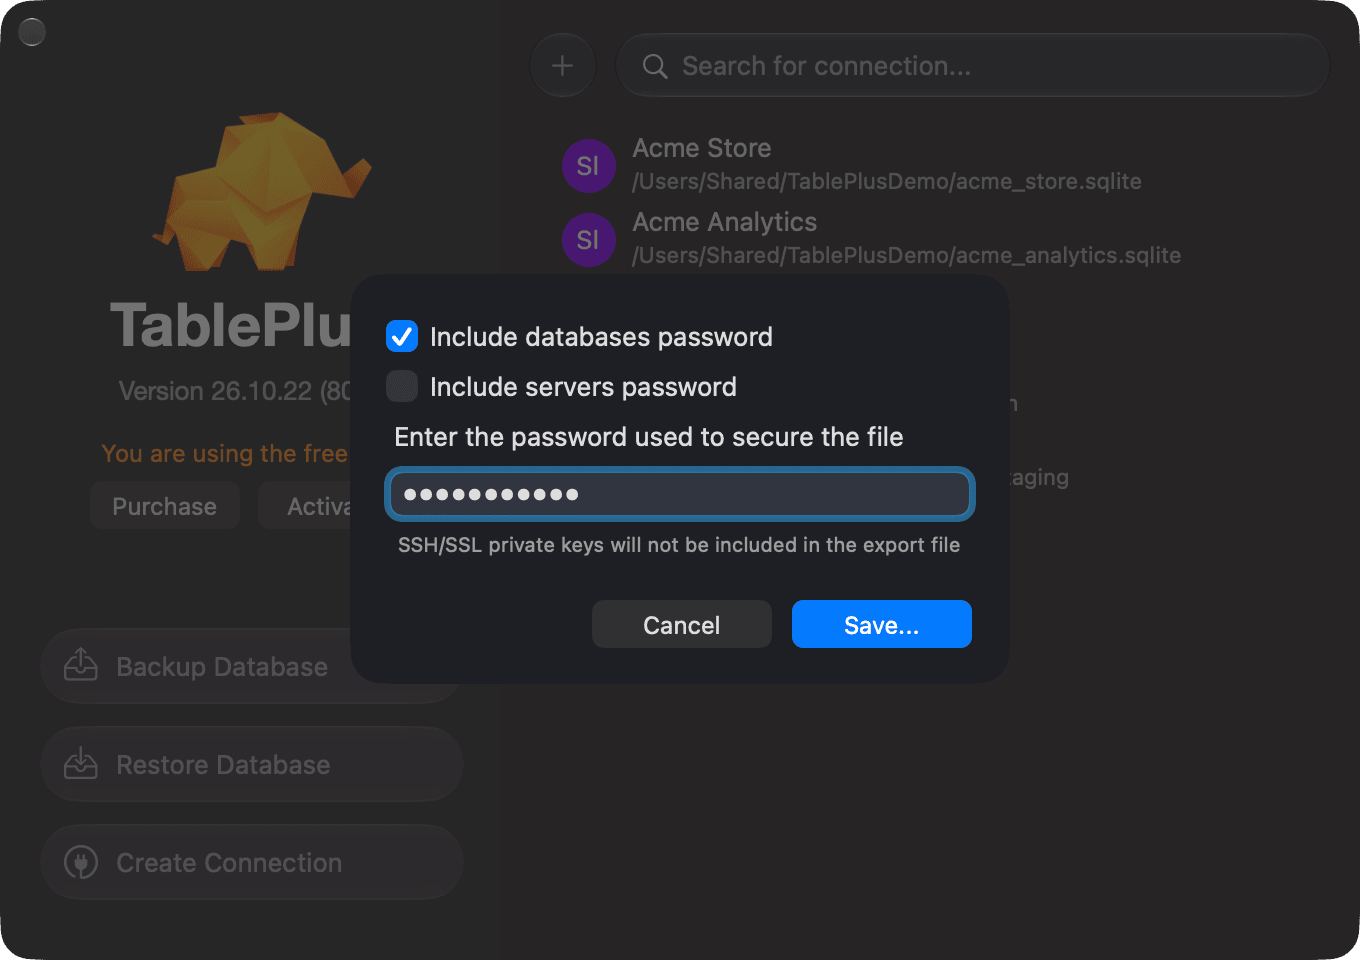
The export file includes group names and icons. SSH and SSL private keys are not included, so you need to choose them again after importing.
Import connections
- On the welcome window, right-click and choose Import Connection > From File.... You can also double-click a
.tableplusconnectionfile in Finder. - Choose the file and enter its password if it has one.
To share connections with your team or keep them in sync between computers, go to Settings > Connections, click Add under Connection Sources, and choose a folder that you sync, such as an iCloud Drive or Dropbox folder. Its connections show in a section of their own on the welcome window. Drag a connection into that section to move it there. Passwords are not stored in that folder; they stay in each computer's Keychain.
Switch connection
When you're connected, click the Connection button in the toolbar, or press ⌘ + Shift + K (Connection > Open a Connection...), to show your connections and switch to another one.
Open a connection from the command line
TablePlus handles connection URLs, so you can open a connection from the Terminal, a script, or a link. Run:
open -a TablePlus "postgresql://[email protected]/acme"
To get the URL of a saved connection, right-click it on the welcome window and choose Copy as URL. The copied URL includes the passwords and the connection's options.
You can also open a SQLite database file directly:1
open -a TablePlus ~/Desktop/acme_store.sqlite
Connection URL format
A connection URL has this form:
driver://user:password@host:port/database?option=value&option=value
To connect over SSH, add +ssh to the scheme and put the SSH server first:
driver+ssh://ssh_user:ssh_password@ssh_host:ssh_port/user:password@host:port/database?option=value
All values must be URL encoded. Leave out the port to use the driver's default port.
Supported schemes: postgresql (or postgres), mysql, mariadb, sqlserver (or microsoftsqlserver), redshift, cockroach, greenplum, vertica, oracle, clickhouse, cassandra, redis, mongodb, elasticsearch, duckdb, d1 (or cloudflared1), and sqlite. When you import a URL from the welcome window, snowflake, bigquery, and libsql URLs are also supported.
Connection options:
| Option | Description | Example |
|---|---|---|
name |
Connection name | name=Acme%20Production |
statusColor |
Status bar color, as a hex value without # |
statusColor=007F3D |
env |
Tag name | env=production |
windowMode |
isolated opens a new window (default), tabbed opens a new tab in the current window |
windowMode=tabbed |
tLSMode |
SSL mode | tLSMode=0 |
usePrivateKey |
Use an SSH private key | usePrivateKey=true |
safeModeLevel |
Safe mode level, from 0 to 2 | safeModeLevel=0 |
advancedSafeModeLevel |
Advanced safe mode level, 0 or 1 | advancedSafeModeLevel=0 |
driverVersion |
Driver version | driverVersion=0 |
lazyload |
Lazy load the items in each schema | lazyload=true |
The simplest way to get the right values for
tLSModeand the safe mode options is to set them in the connection form, then use Copy as URL.
Open a table with a filter
You can also tell TablePlus which table to open and how to filter it. Add these options to the URL:
| Option | Description | Example |
|---|---|---|
schema |
Schema (or database) of the table | schema=public |
table |
Table or view to open (view and item also work) |
table=orders |
column |
Column to filter by | column=status |
operation |
Filter operator (operator also works), as in the filter |
operation=Contains |
value |
Value to filter by | value=shipped |
condition |
A raw SQL condition, used instead of column, operation, and value (raw and query also work) |
condition=id%3D29%20OR%20id%3D28 |
Open the orders table filtered by a column:
open -a TablePlus "postgresql://[email protected]/acme?schema=public&table=orders&column=status&operation=Contains&value=shipped"
Open the orders table with a raw SQL condition:
open -a TablePlus "postgresql://[email protected]/acme?schema=public&table=orders&condition=id%3D29%20OR%20id%3D28"
TablePlus connects, opens the table in a new tab, and applies the condition as a raw SQL filter.
-
The
opencommand is only available on macOS. ↩︎