Trigger
You manage the triggers of a table from its Structure tab. Triggers are available for MySQL, MariaDB, PostgreSQL, and Redshift.
Changes are kept locally until you press ⌘ + S1 to commit them to the server.
Create trigger
- Open the table's Structure tab (
⌃ + ⌘ + ]). - Click the Triggers button in the bottom bar.
- In the popover, click + Trigger (
⌘ + I), or double-click the empty area below the last trigger. - Set the trigger's name, timing (for example
BEFOREorAFTER), and event (for exampleINSERTorUPDATE), then write the trigger statement in the editor to the right of the list. - Press
⌘ + Sto commit the change.
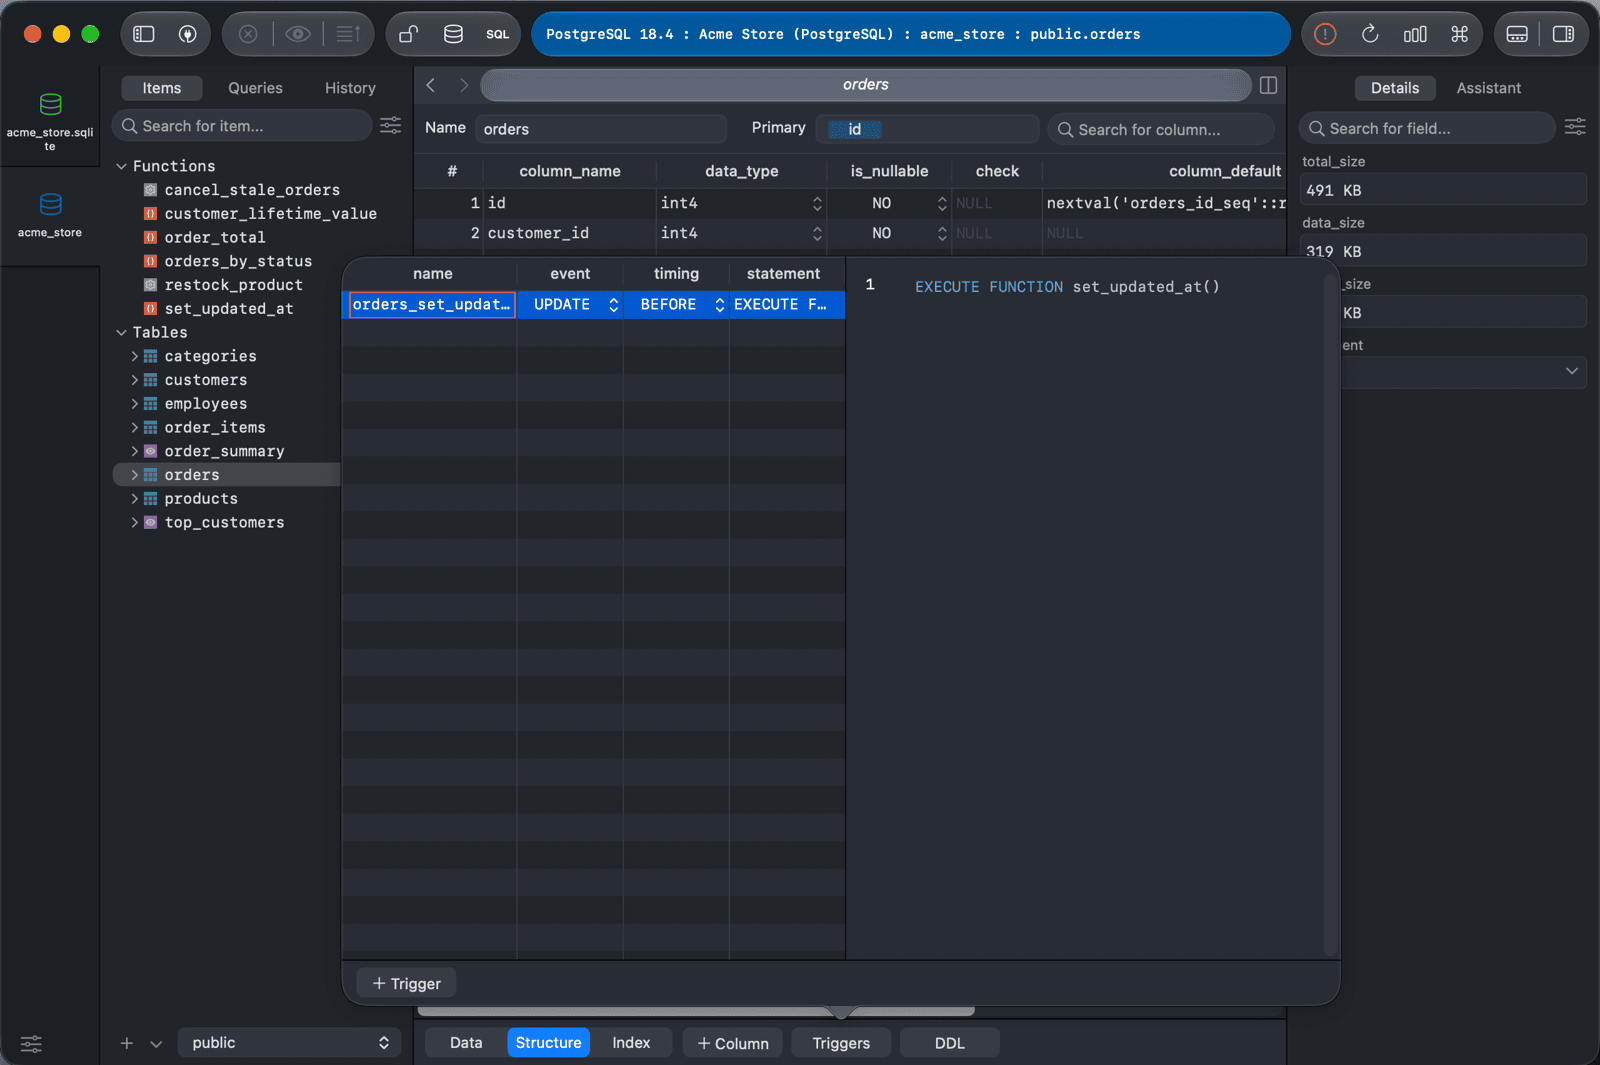
Edit trigger
- Open the table's Structure tab (
⌃ + ⌘ + ]). - Click the Triggers button in the bottom bar to see the table's triggers.
- Double-click an attribute of the trigger to edit it inline, or select the trigger and edit its statement in the editor.
- Press
⌘ + Sto commit the change.
Delete trigger
- Open the table's Structure tab (
⌃ + ⌘ + ]). - Click the Triggers button in the bottom bar to see the table's triggers.
- Select the trigger and press
Delete, or right-click it and choose Delete. - Press
⌘ + Sto commit the change.
-
On Windows and Linux, use
Ctrl + S. ↩︎